This quickstart guides you through how to create your first managed control plane in Upbound with configuration-caas. Connect Upbound to AWS, GCP, and Azure to provision and manage fully configured Kubernetes Service clusters. They’re composed using cloud service primitives from the Upbound Official Providers.
Prerequisites
To deploy Upbound’s configuration-caas, you need:
- An Upbound account.
- A GitHub account with permission to install GitHub Apps.
- At least one of the following:
- An AWS account with permissions to manage IAM policies.
- An Azure account with permissions to manage IAM policies.
- A GCP account with permissions to manage IAM policies.
Get started
The first time you sign in to Upbound, you are through a Get Started experience designed to bootstrap your environment in the matter of minutes. Go to Upbound to start the experience.
Get started
This quickstart guides you through how to create your first managed control plane in Upbound. Connect Upbound to your cloud provider, and use your control plane to create and manage infrastructure.
After you register your Upbound account, walk through the interactive “Get Started” demo below.
Select the Configuration called Cluster as a Service.
Give your repository a name, like my-control-plane-api.
Select Create Control Plane.
Complete the flow
On the final screen of the Get Started experience, review your work. Observe the configuration you’ve cloned and the control plane you’ve created. This screen shows information about the providers that you need to authenticate with after launching your new control plane.

Welcome to the Upbound Console
After completing the Get Started experience, you are in the Upbound control plane explorer. The console shows a message with pointers for what to do next.
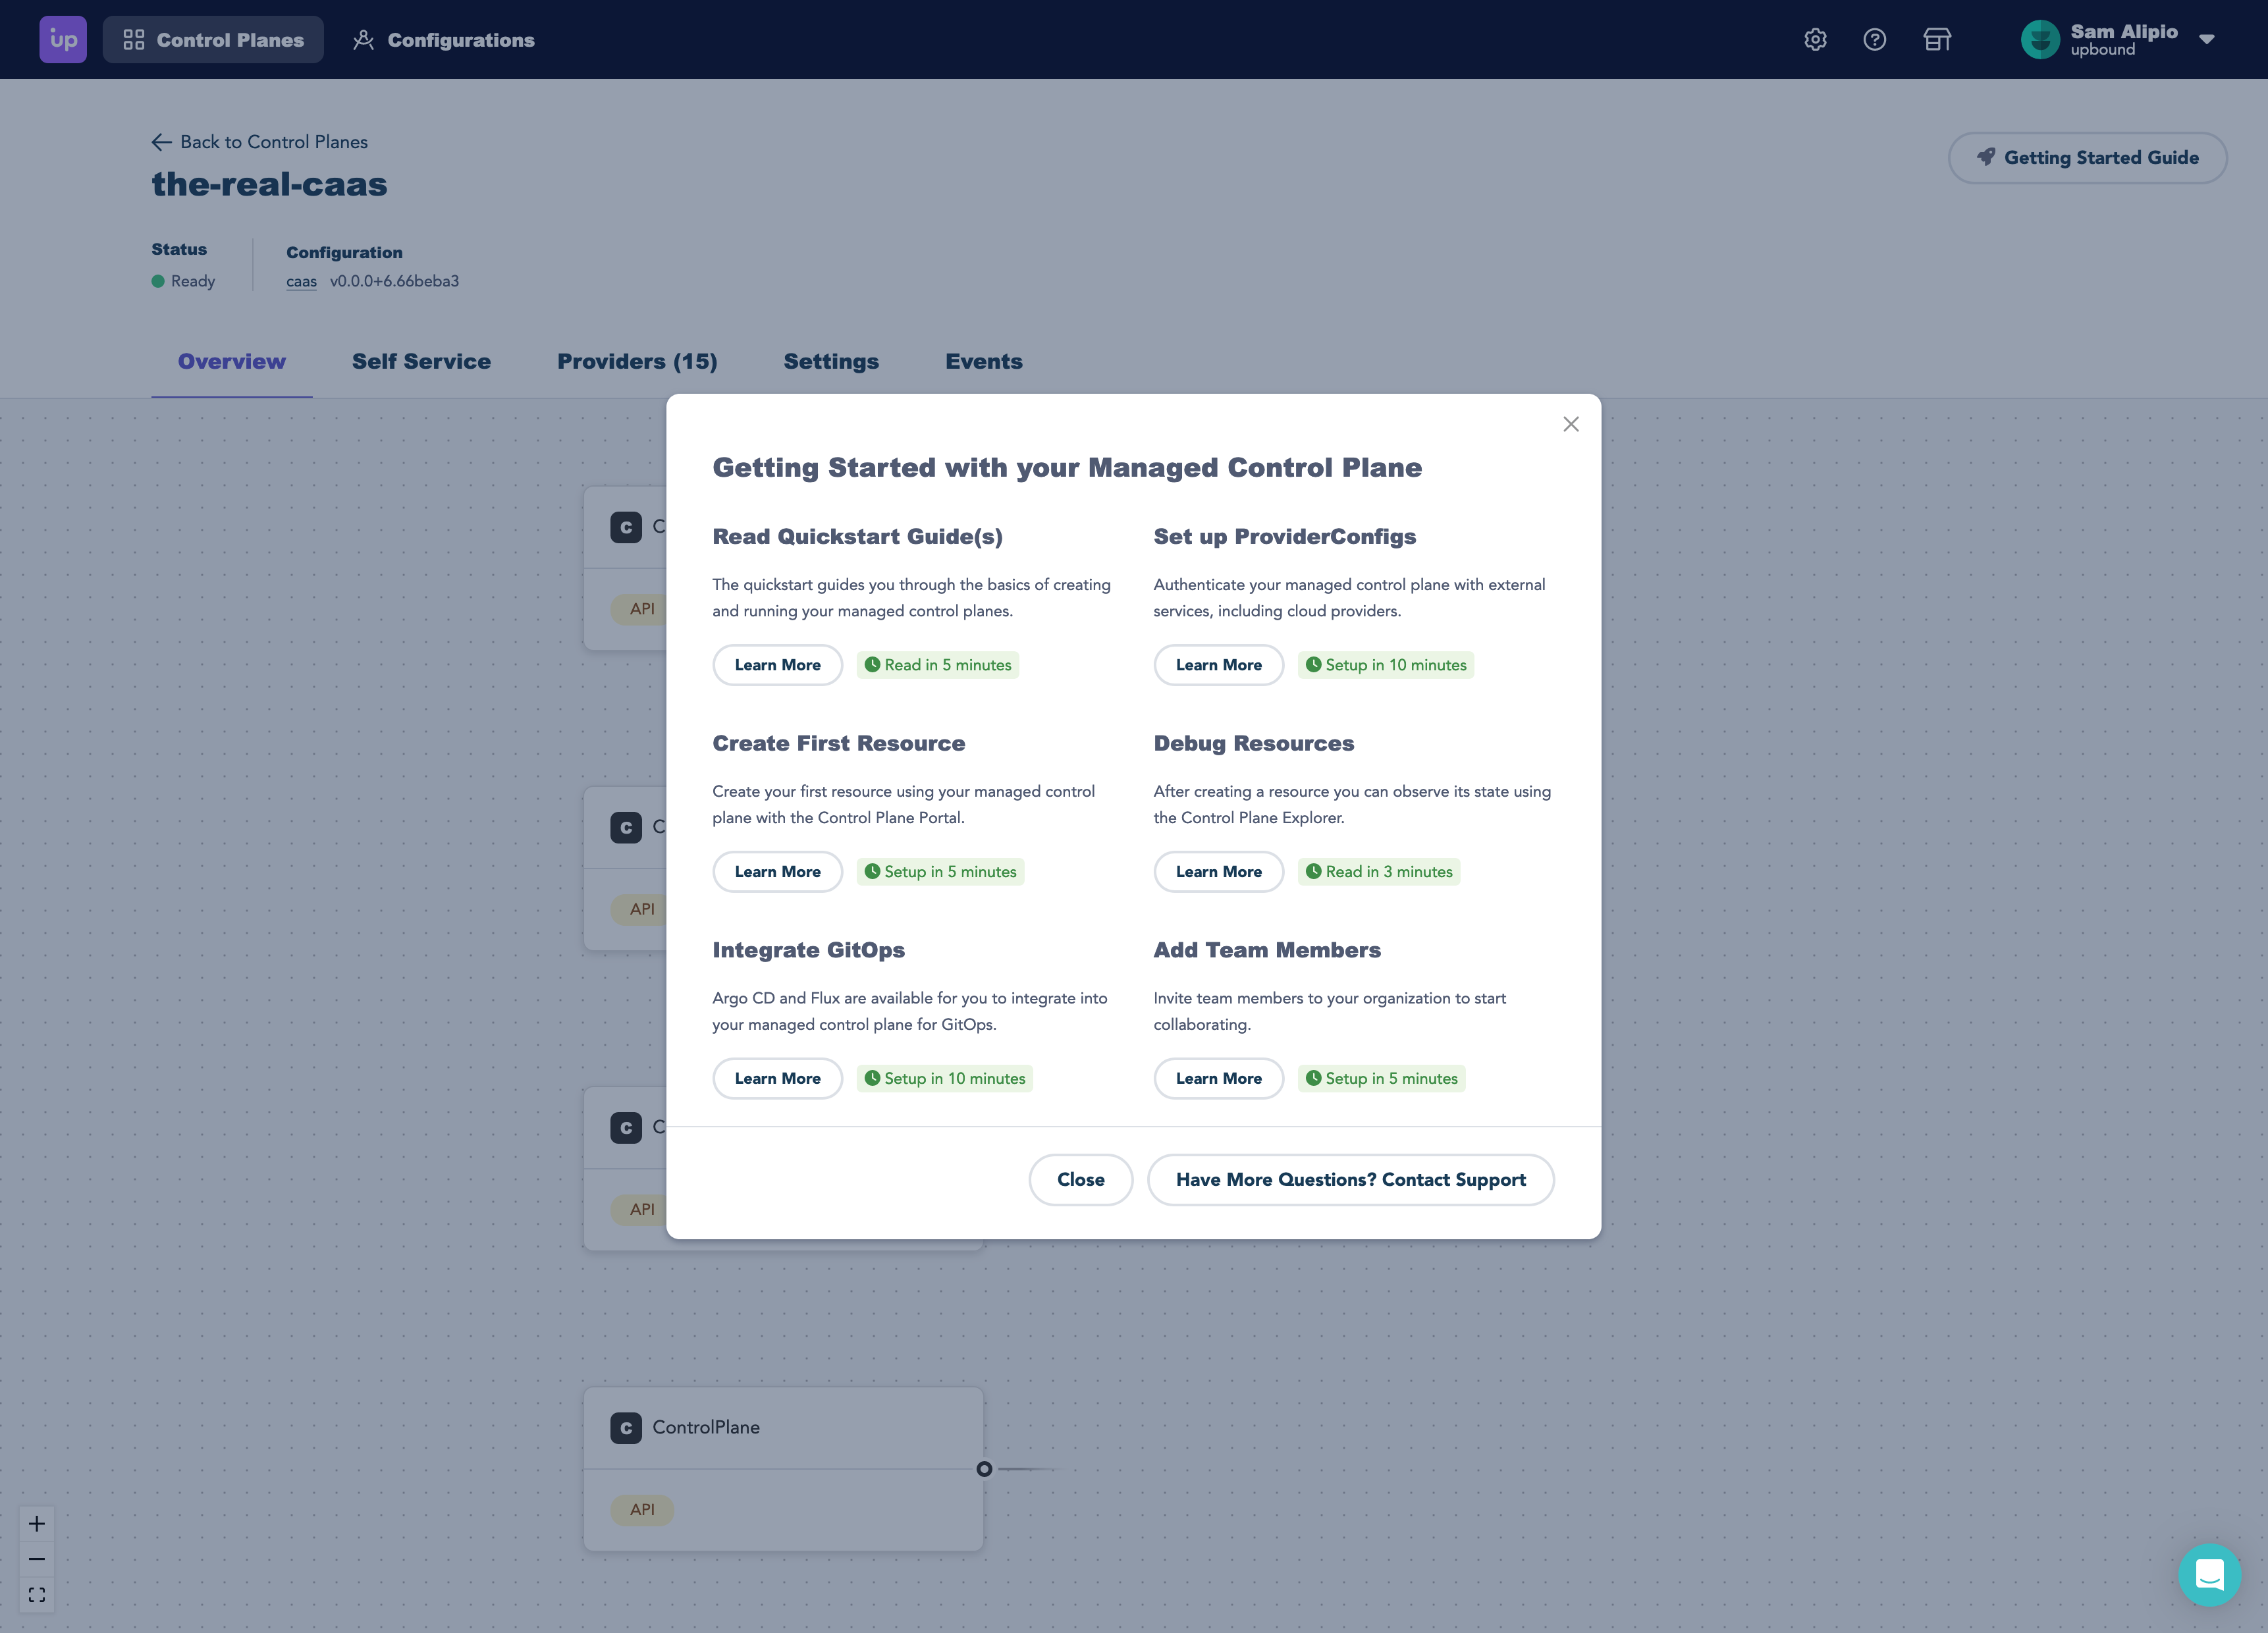
You can reopen this guide at any time by selecting the Getting Started Guide button in the upper right corner of the control plane explorer.
The control plane details view gives you a view into what’s happening on your control plane.
Authenticate with Providers
Next, configure provider-upbound and connect your managed control plane to each cloud service provider you wish to use in your CaaS offering. You must configure provider-upbound via the CLI, but you can authenticate with cloud service providers from within the Upbound Console UI.
Configure provider-upbound
Provider Upbound needs a valid Upbound token to authenticate. You can fetch one in multiple ways, but the simplest option is to log in with Up CLI to get a session token.
Log in with the up login command to save a token to ~/.up/config.json
Then, create a Secret object that contains the token.
kubectl -n crossplane-system create secret generic up-creds --from-file=creds=$HOME/.up/config.json
Next, create a ProviderConfig object that references the Secret object you just created. The following command creates a ProviderConfig object that references the Secret object you just created.
cat <<EOF | kubectl apply -f -
apiVersion: upbound.io/v1alpha1
kind: ProviderConfig
metadata:
  name: default
spec:
  credentials:
    source: Secret
    secretRef:
      namespace: crossplane-system
      name: up-creds
      key: creds
EOF
Connect to AWS with OIDC
Upbound recommends using OpenID Connect (OIDC) to authenticate to AWS without exchanging any private information.
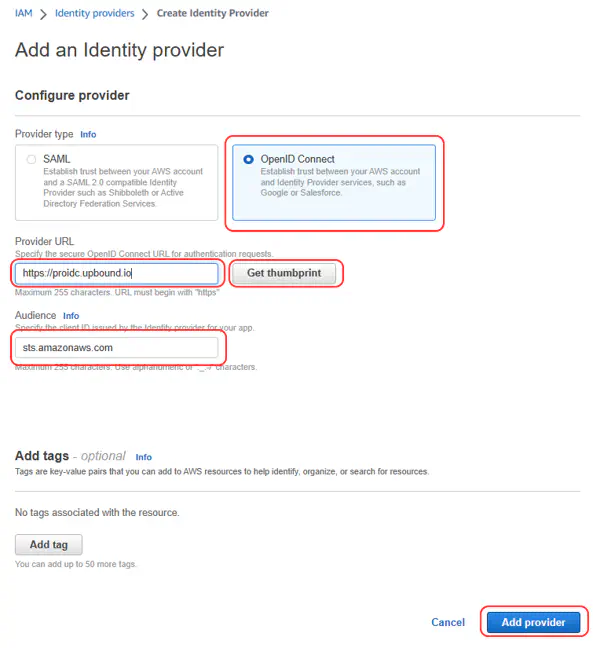
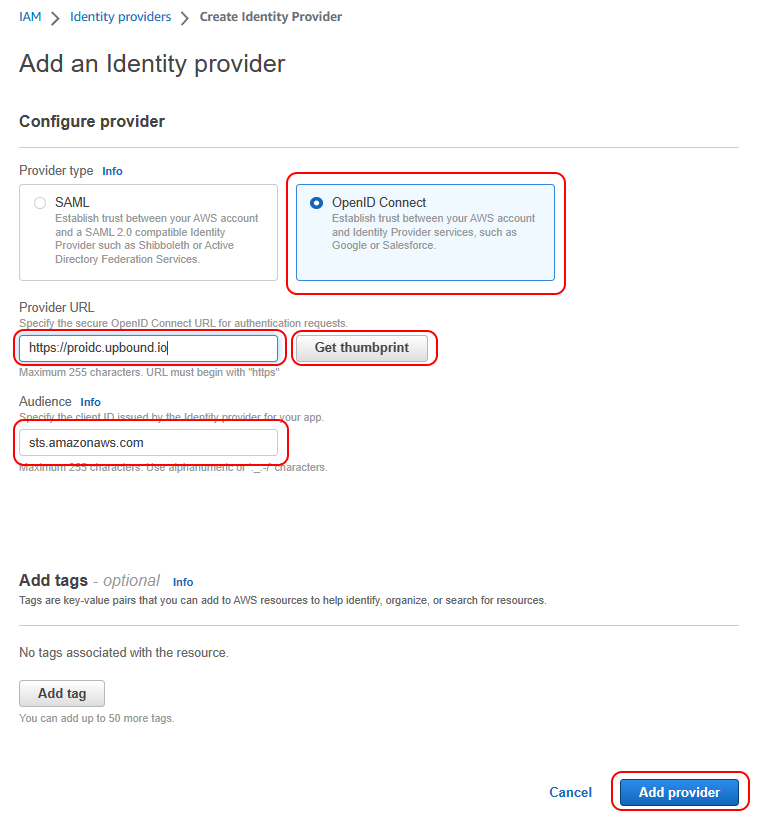
Add Upbound as an OpenID Connect provider
- Open the AWS IAM console.
- Under the AWS IAM services, select Identity Providers > Add Provider.
- Select OpenID Connect and use
https://proidc.upbound.io as the Provider URL and
sts.amazonaws.com as the Audience.
Select Get thumbprint.
Select Add provider.
Create an AWS IAM Role for Upbound
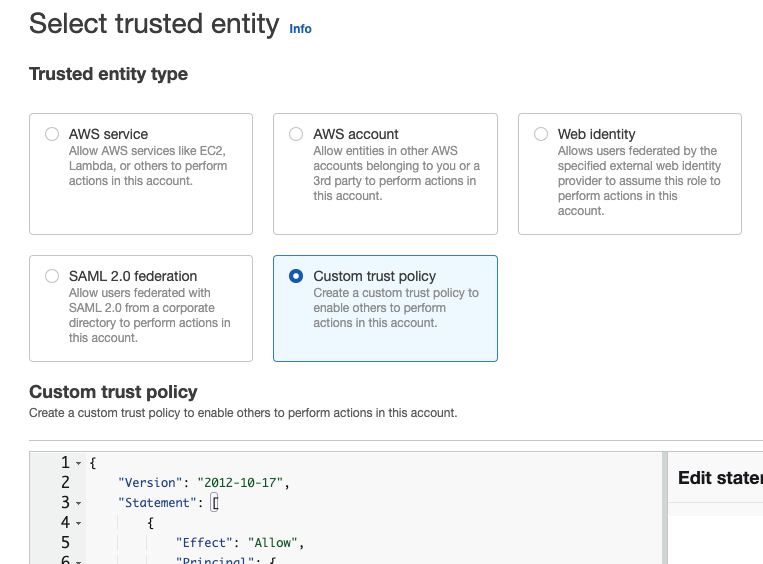
- Create an AWS IAM Role with a Custom trust policy for the OIDC connector.
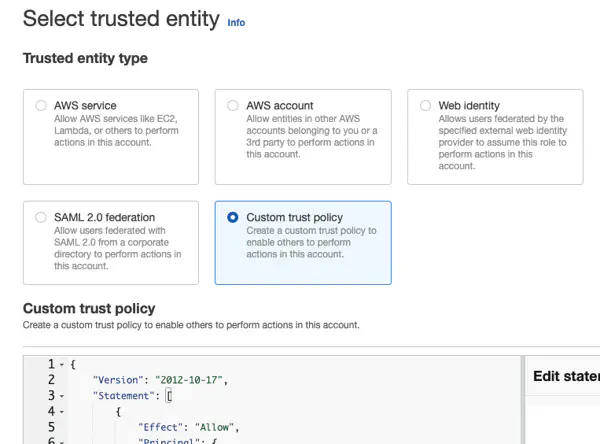 Important
Provide your AWS account ID, Upbound organization and control plane names in the JSON Policy below.
You can find your AWS account ID by selecting the account dropdown in the upper right corner of the AWS console.
{ "Version": "2012-10-17", "Statement": [ { "Effect": "Allow", "Principal": { "Federated": "arn:aws:iam:::oidc-provider/proidc.upbound.io" }, "Action": "sts:AssumeRoleWithWebIdentity", "Condition": { "StringEquals": { "proidc.upbound.io:sub": "mcp::provider:provider-aws", "proidc.upbound.io:aud": "sts.amazonaws.com" } } } ] } - Attach the AmazonEC2FullAccess permission policy.

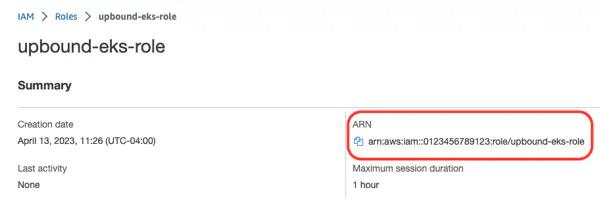
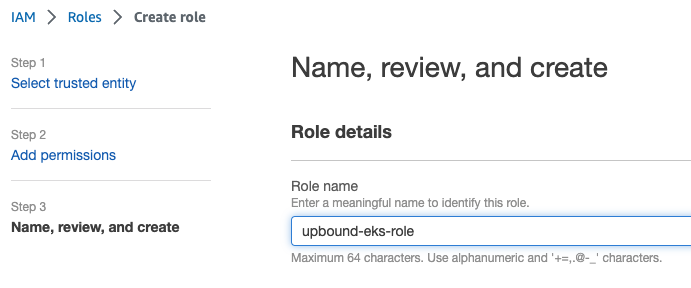
- Name the role upbound-eks-role and select Create role.

- View the new role and copy the role ARN.

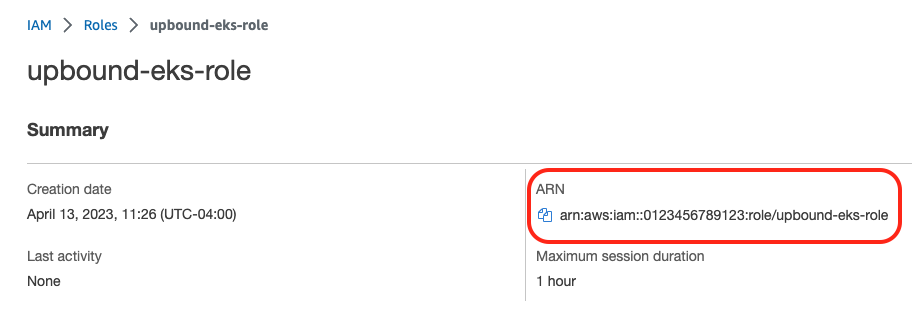
Provide the ARN to Upbound
Return to Upbound and head to the Providers tab within the control plane explorer. Find provider-family-aws and select the ProviderConfigs tab. Then, select Create ProviderConfig
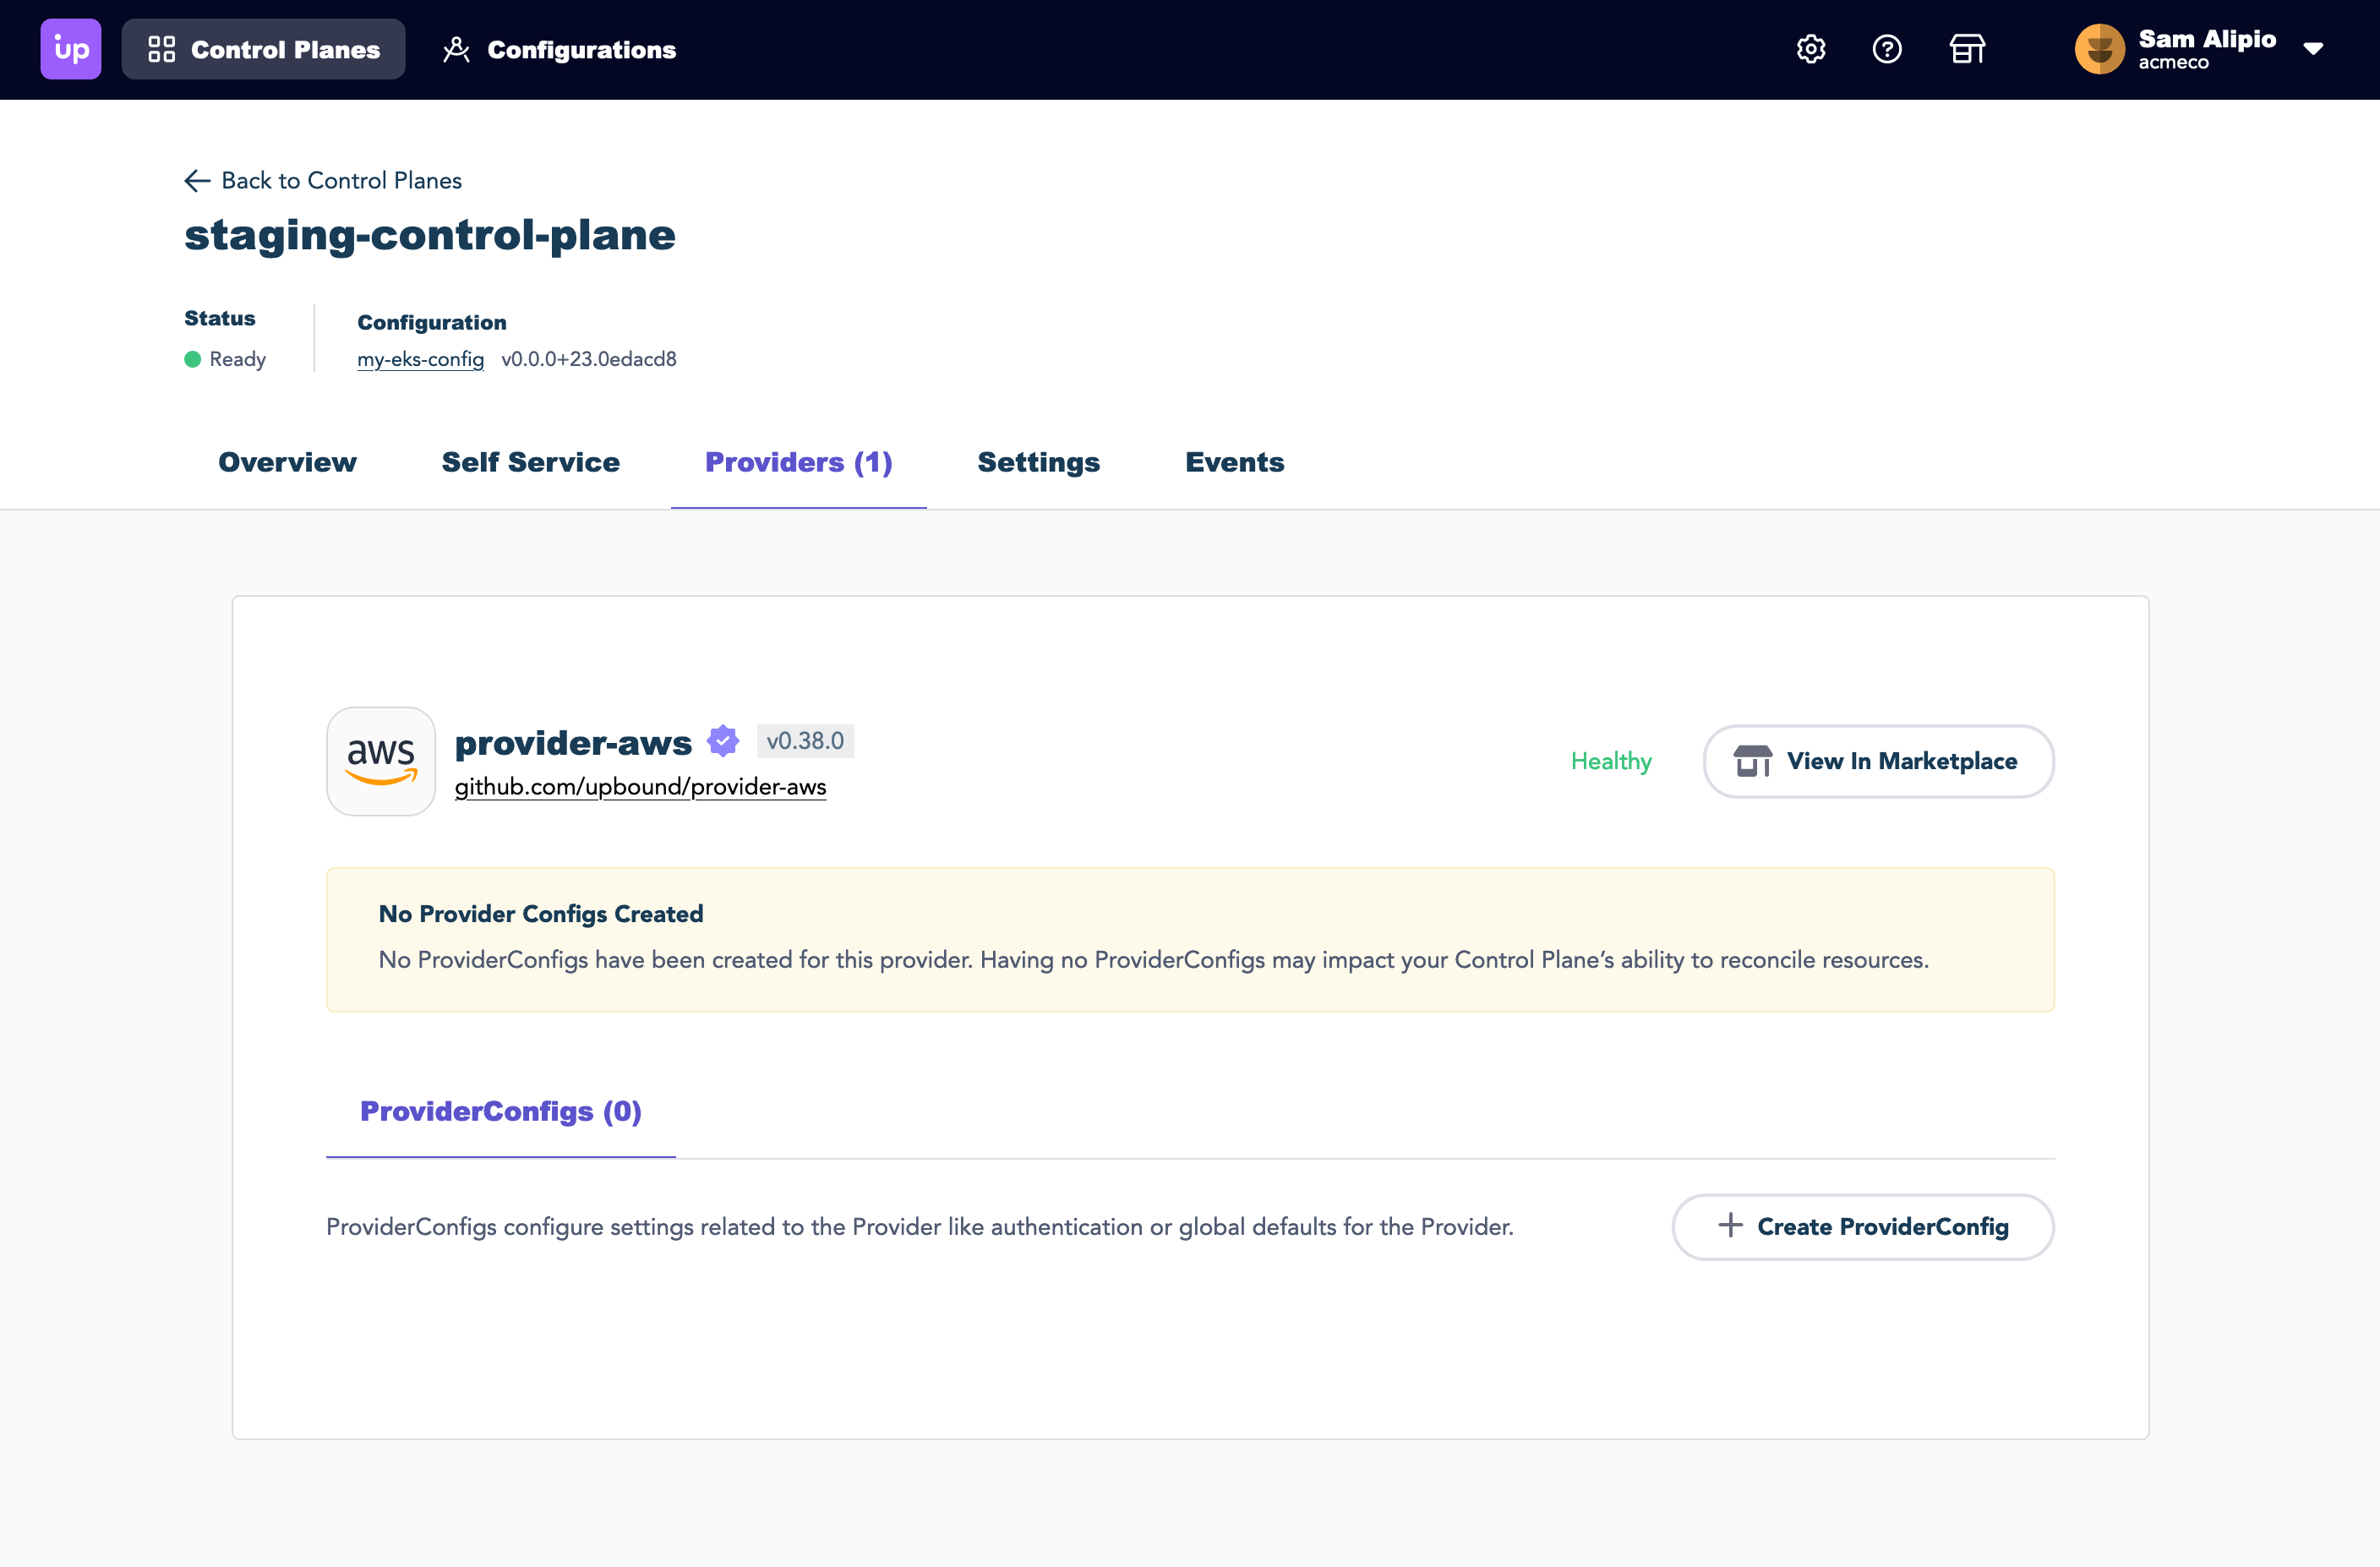
On the screen that displays, give the ProviderConfig a name. Entering the name default sets this as the default ProviderConfig for this provider in this control plane.
Next, paste the roleARN you copied from AWS into the input at the bottom of the form.
Select Create to finish authenticating with AWS.
Connect to Azure with OIDC
Upbound recommends using OpenID Connect (OIDC) to authenticate to Azure without exchanging any private information.
Create an identity pool
- Open the Azure portal.
- Select Microsoft Entra ID.
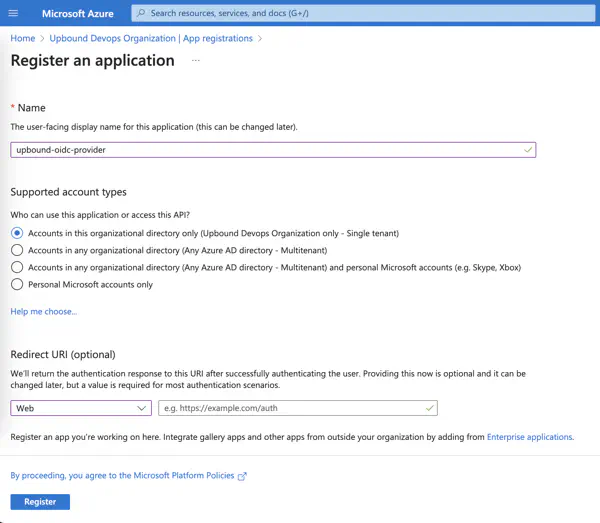
- If this is your first time registering Upbound as an identity provider in Microsoft Entra ID, select App registrations
- At the top of the page, select New registration.
- Name the pool, like upbound-oidc-provider.
- In the Supported account types section select Accounts in this organizational directory only.
- In the Redirect URI section select Web and leave the URL field blank.
- Select Register.

Create a federated credential
To allow the upbound-oidc-provider registration created in the previous step to trust the Upbound Control Plane, do the following in the resource view.
- Select Certificates and secrets in the left navigation.
- Select Federated credentials tab.
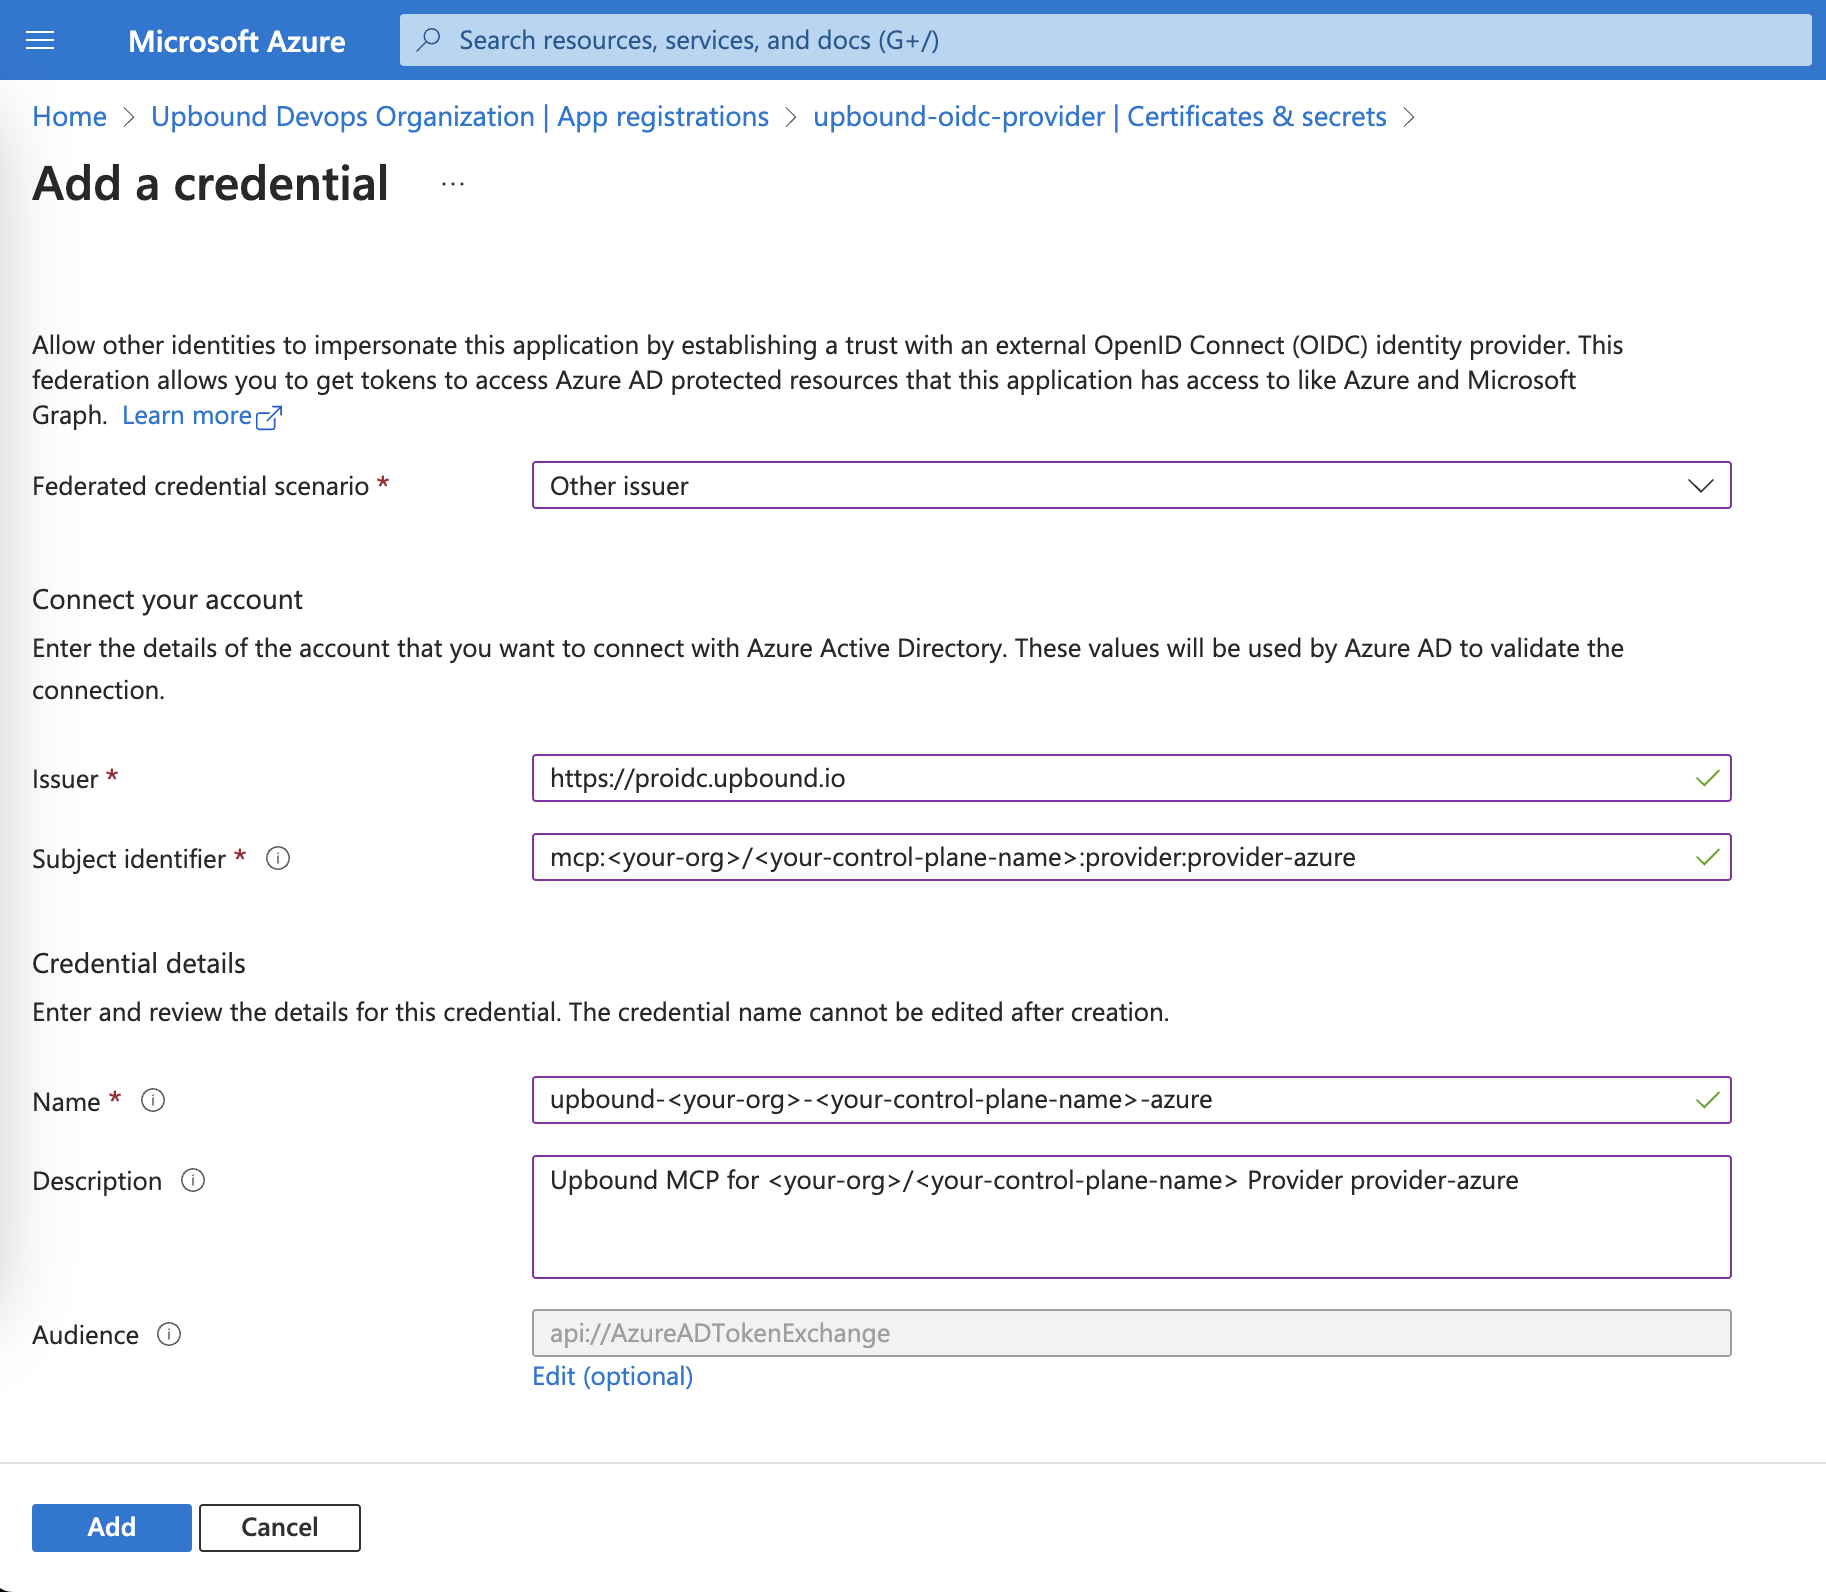
- Select Add credential.
- In Federated credential scenario select Other Issuer.
- In Issuer enter https://proidc.upbound.io.
- In Subject identifier enter:
mcp::provider:provider-azure
- In Credential details name enter:
upbound--provider-azure
- In Credential details description enter:
upbound MCP Provider provider-azure
- Leave Audience unmodified with api://AzureADTokenExchange.
- Select Add.
Grant permissions to the service principal
For your control plane to be able to perform actions required by this configuration, you need to grant permissions to the Application Service Principal. Assign a role to the Application Service Principal by following instructions at Assign a role to the application.
- Open the Azure portal
- Select Subscriptions.
- Select your subscription.
- Select Access control (IAM) in the left navigation.
- Select Add and select Add role assignment.
- Find and select the Contributor role on the Privileged administrator roles tab.
- Select Next.
- In Assign access to select User, group, or service principal.
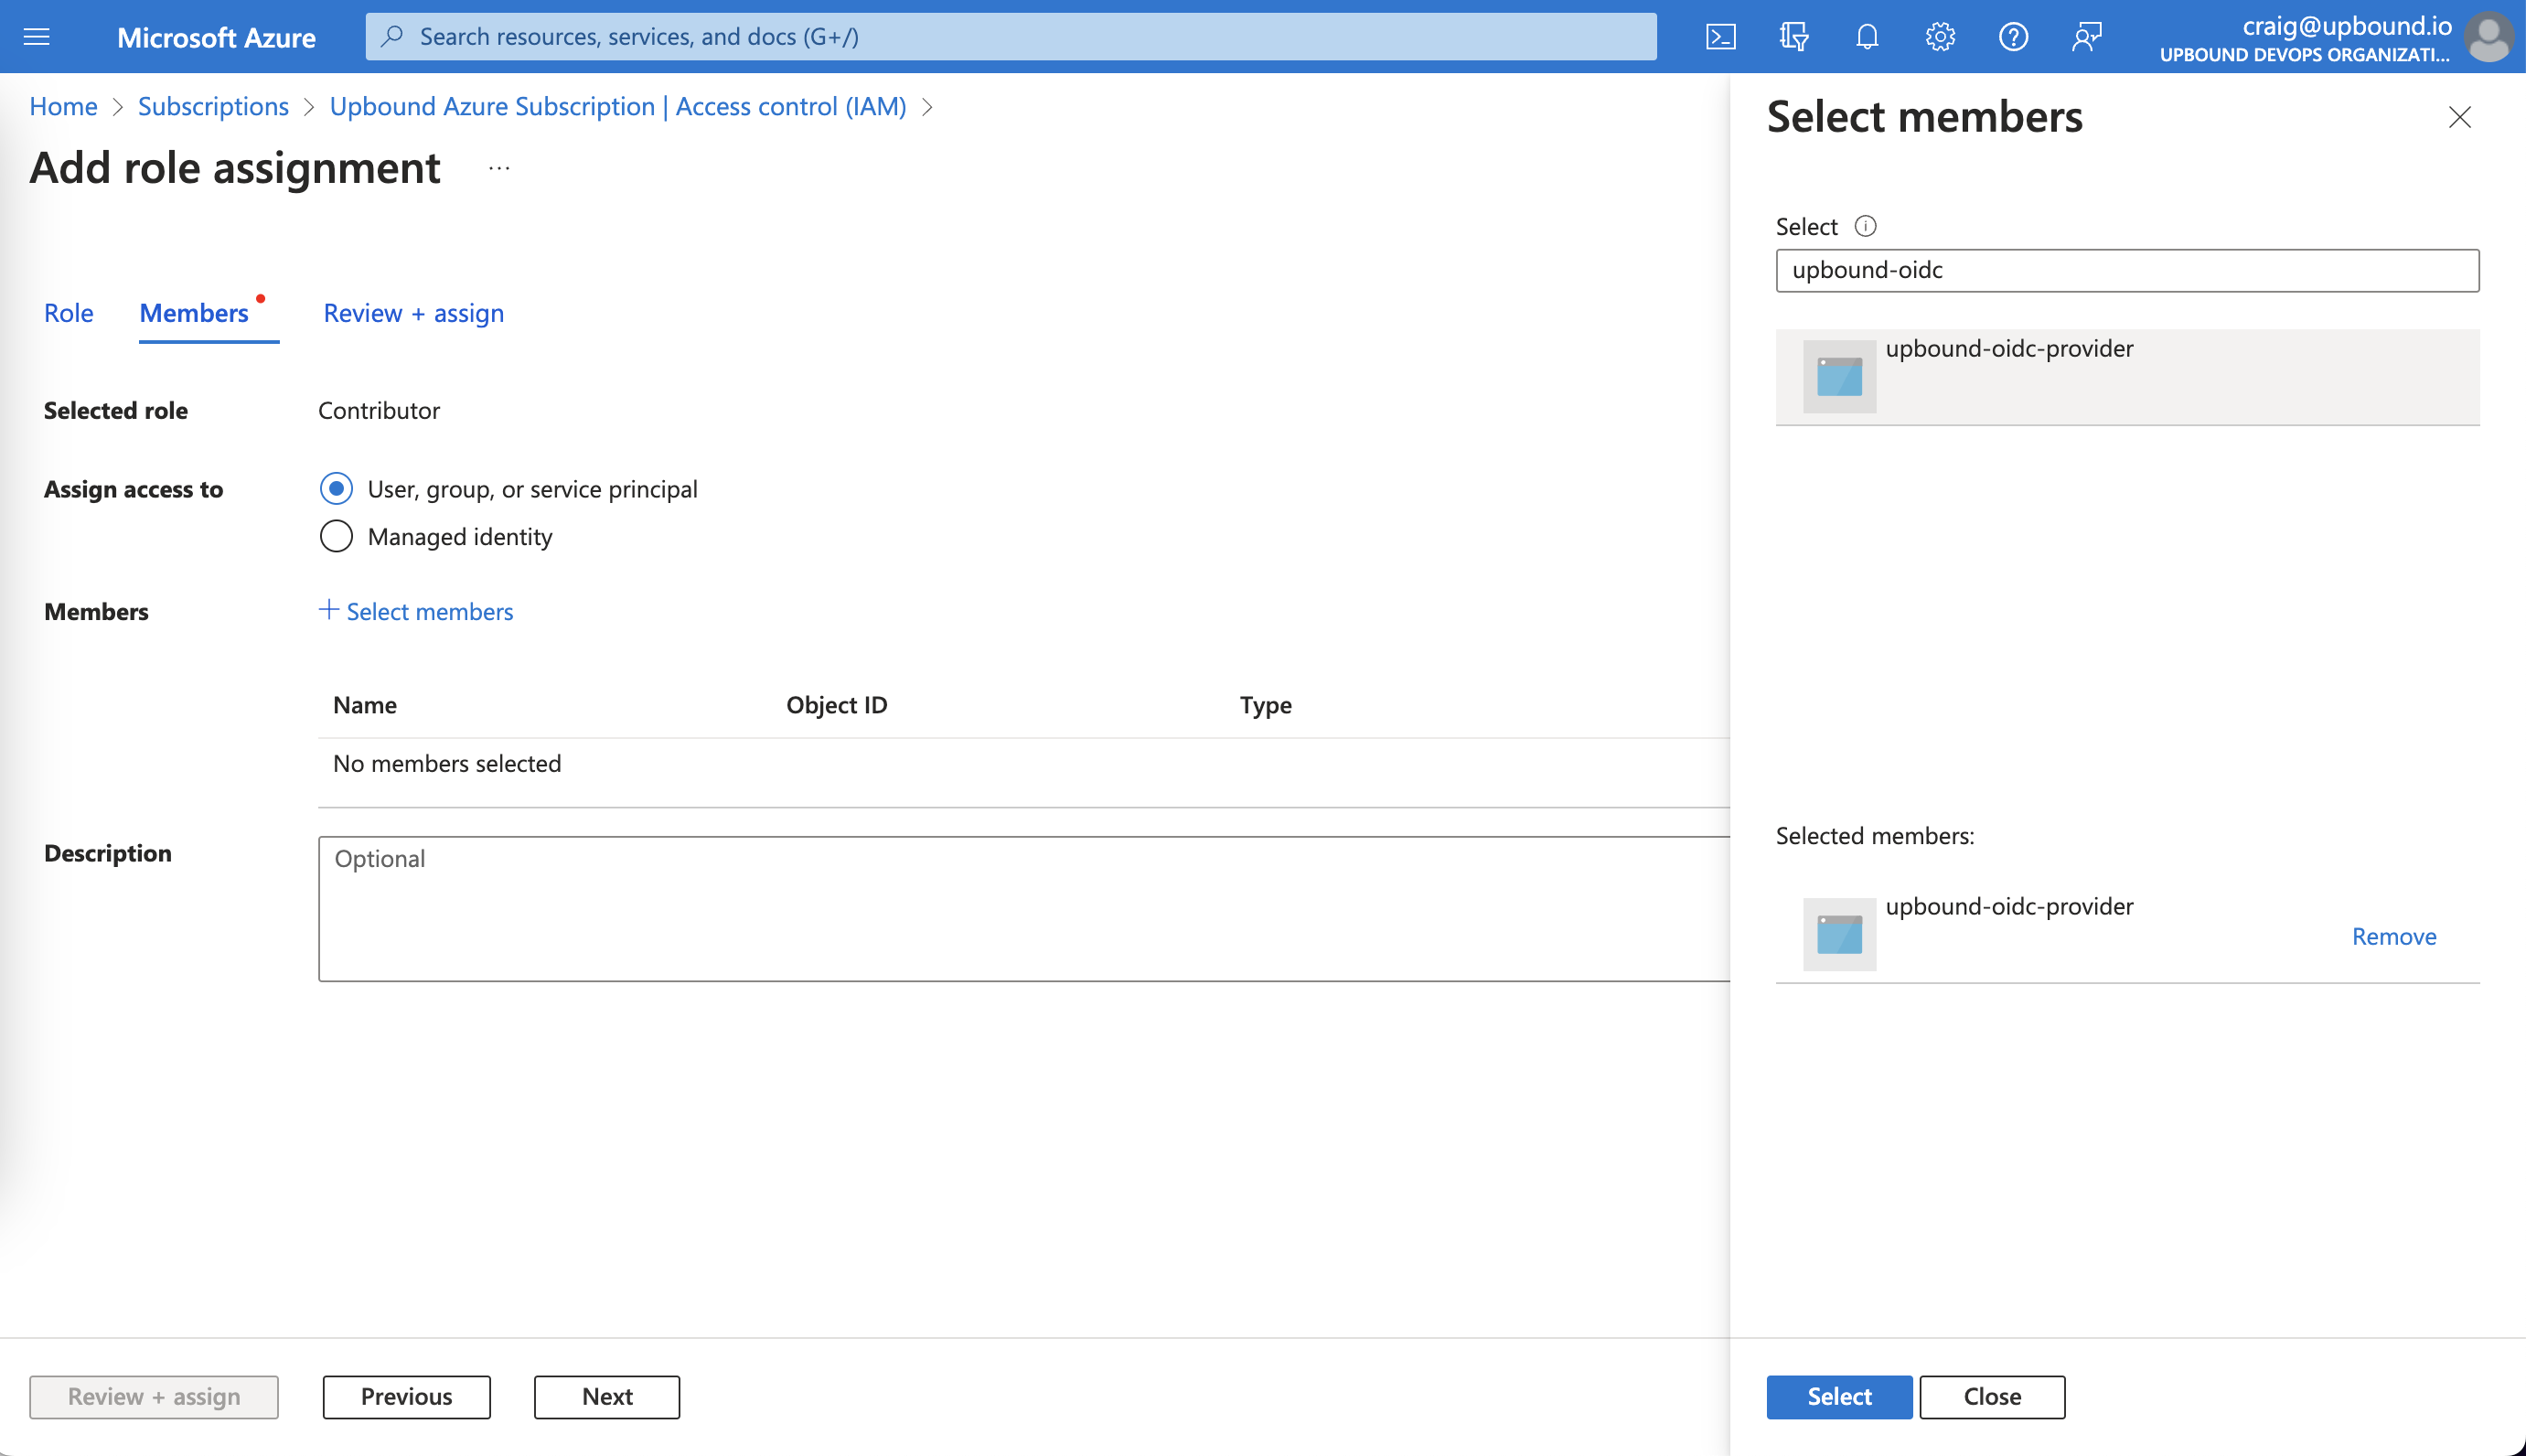
- Select Select members.
- Find your application by entering upbound-oidc-provider in the search field.
- Select Select.
- Select Review + assign.
- Make sure everything is correct and press Review + assign again.
Finish configuring the Upbound identity provider
Return to Upbound and head to the Providers tab within the control plane explorer. Find provider-family-azure and select the ProviderConfigs tab. Then, select Create ProviderConfig

On the screen that displays, give the ProviderConfig a name. Entering the name default sets this as the default ProviderConfig for this provider in this control plane.
Next, scroll to the bottom of the form.
In the clientID field enter your Application (client) ID.
For the tenant ID field, enter your Directory (tenant) ID. You can find this by selecting your Application under Azure Active Directory -> Application Registrations.
In the subscriptionID field, enter your Subscription ID. You can find this by selecting your Subscription in the Azure portal.
Select Create to finish authenticating with Azure.
Connect to GCP with OIDC
While Upbound creates your control plane, connect Upbound to GCP.
Upbound recommends using OpenID Connect (OIDC) to authenticate to GCP without exchanging any private information.
GCP doesn’t authenticate a second OIDC pool in the same project connecting to Upbound.
Add a new Service Account to the existing pool instead.
Create an identity pool
- Open the GCP IAM Admin console.
- Select Workload Identity Federation.
- If this is your first Workload Identity Federation configuration select Get Started
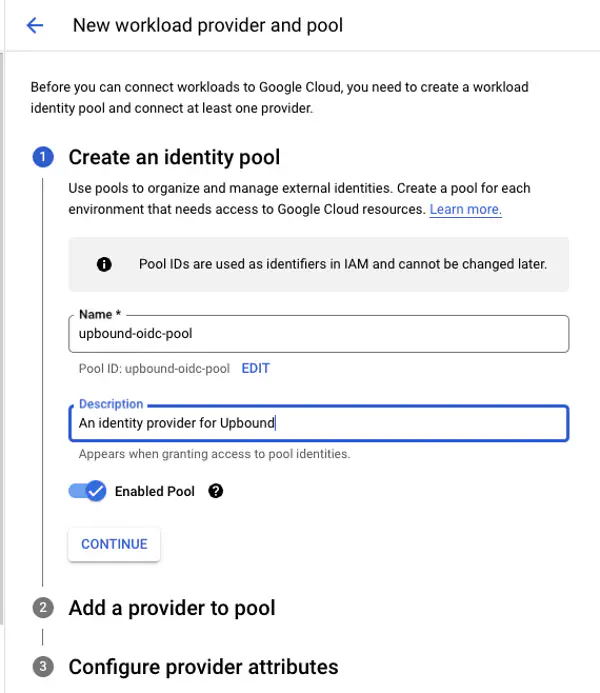
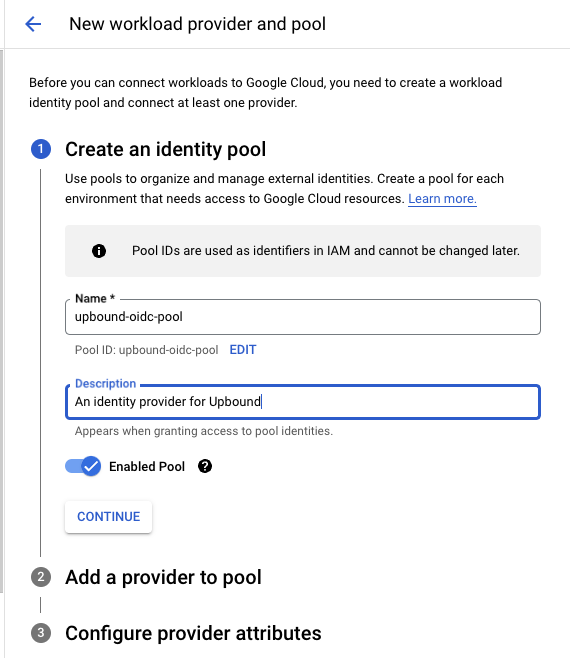
- At the top of the page, select Create Pool.
- Name the pool, like upbound-oidc-pool.
- Enter a description like An identity provider for Upbound.
- Enable the pool.
- Select Continue
Add Upbound to the pool
Under the Add a provider to pool configuration under Select a provider use OpenID Connect (OIDC)
Provider Name: upbound-oidc-provider Provider ID: upbound-oidc-provider-id Issuer (URL): https://proidc.upbound.io
Select Allowed audiences For Audience 1 enter sts.googleapis.com
Select Continue.

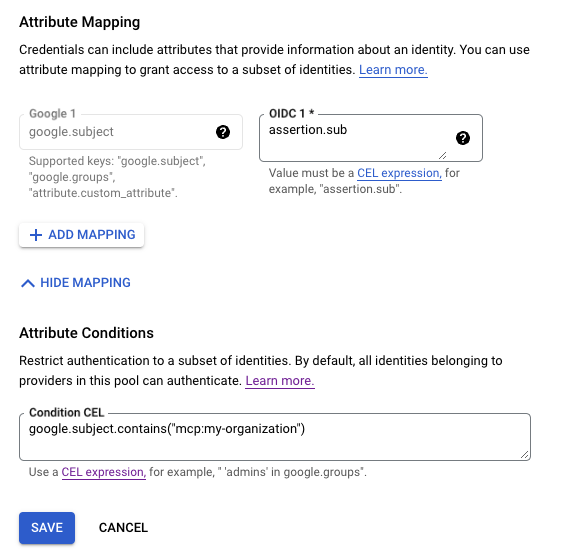
Configure provider attributes
The provider attributes restrict which remote entities you allow access to your resources.
When Upbound authenticates to GCP it provides an OIDC subject (sub) in the form:
mcp:<account>/<mcp-name>:provider:<provider-name>
Configure the google.subject attribute as assertion.sub
Under Attribute Conditions select Add Condition.
To authenticate any managed control plane in your organization, in the Conditional CEL input box put
google.subject.contains("mcp:")
Select Save.
Create a GCP Service Account
GCP requires Upbound to use a Service Account. The required GCP roles of the service account depend on the services managed by your control plane.
- Open the GCP IAM Admin console.
- Select Service Accounts.
- From the top of the page, select Create Service Account.
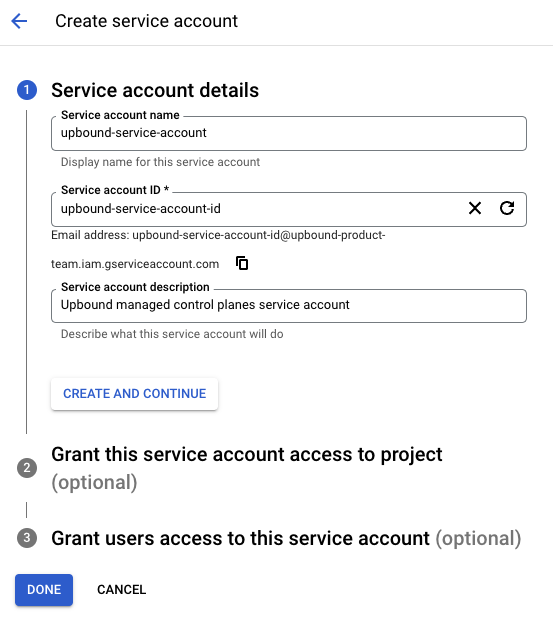
Service account details
Under Service account details enter Service account name: upbound-service-account Service account ID: upbound-service-account-id Description: Upbound managed control planes service account
Select Create and Continue.
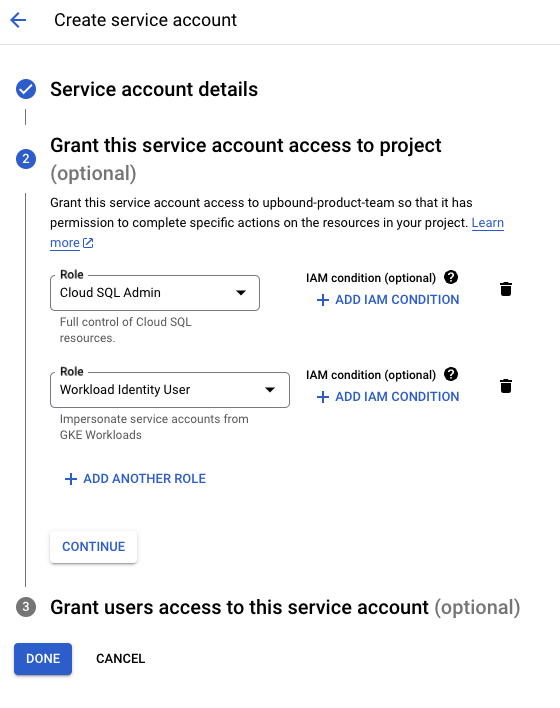
Grant this service account access to project
For the CloudSQL as a service configuration the service account requires the roles: Cloud SQL Admin Workload Identity User
Select Done.
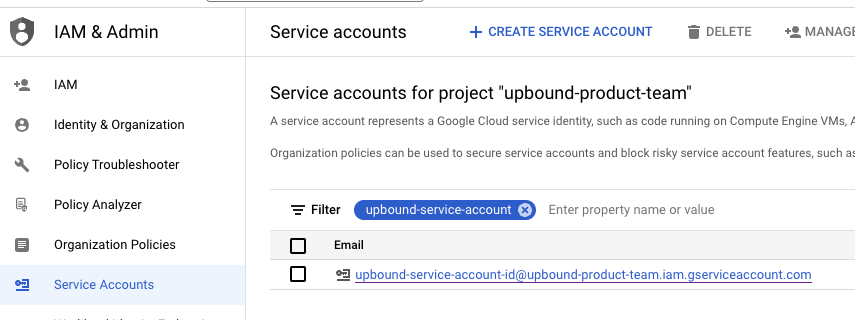
Record the service account email address
At the list of service accounts copy the service account email. Upbound requires this to authenticate your managed control plane.
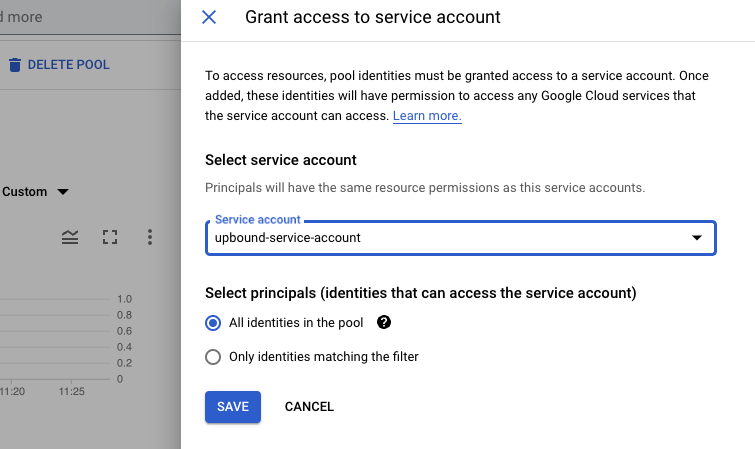
Add the service account to the identity pool
Add the service account to the Workload Identity Federation pool to authenticate to Upbound with OIDC.
- Return to the Workload Identity Federation page and select the upbound-oidc-pool.
- Near the top of the page select Grant Access.
- Select the new service account, upbound-service-account.
- Under Select principals use All identities in the pool.Select Save. In the Configure your application window, select Dismiss.

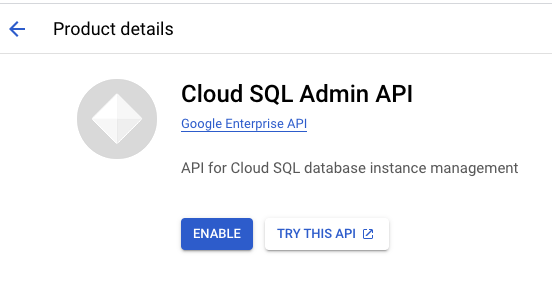
Enable the Cloud SQL Admin GCP API
GCP requires explicitly enabling the Cloud SQL Admin API.
Go to the Cloud SQL Admin API page in the GCP console.
Select Enable.
Finish configuring the Upbound identity provider
Return to Upbound and head to the Providers tab within the control plane explorer. Find provider-family-gcp and select the ProviderConfigs tab. Then, select Create ProviderConfig
On the screen that displays, give the ProviderConfig a name. Entering the name default sets this as the default ProviderConfig for this provider in this control plane.
Next, scroll past the instructions to the bottom of the form.
For the providerID field, enter the following after editing your GCP Project Number:
projects//locations/global/workloadIdentityPools/upbound-oidc-pool/providers/upbound-oidc-provider
projects/<GCP_PROJECT_Number>/locations/global/workloadIdentityPools/<OIDC_POOL_NAME>/providers/<OIDC_POOL_PROVIDER_NAME>In the service Account field enter the service account email.
In the projectID field enter your GCP project ID.
Select Create to finish authenticating with GCP.
Create your first resource
From the control planes view, select the Self Service tab, and select Open Control Plane Portal.
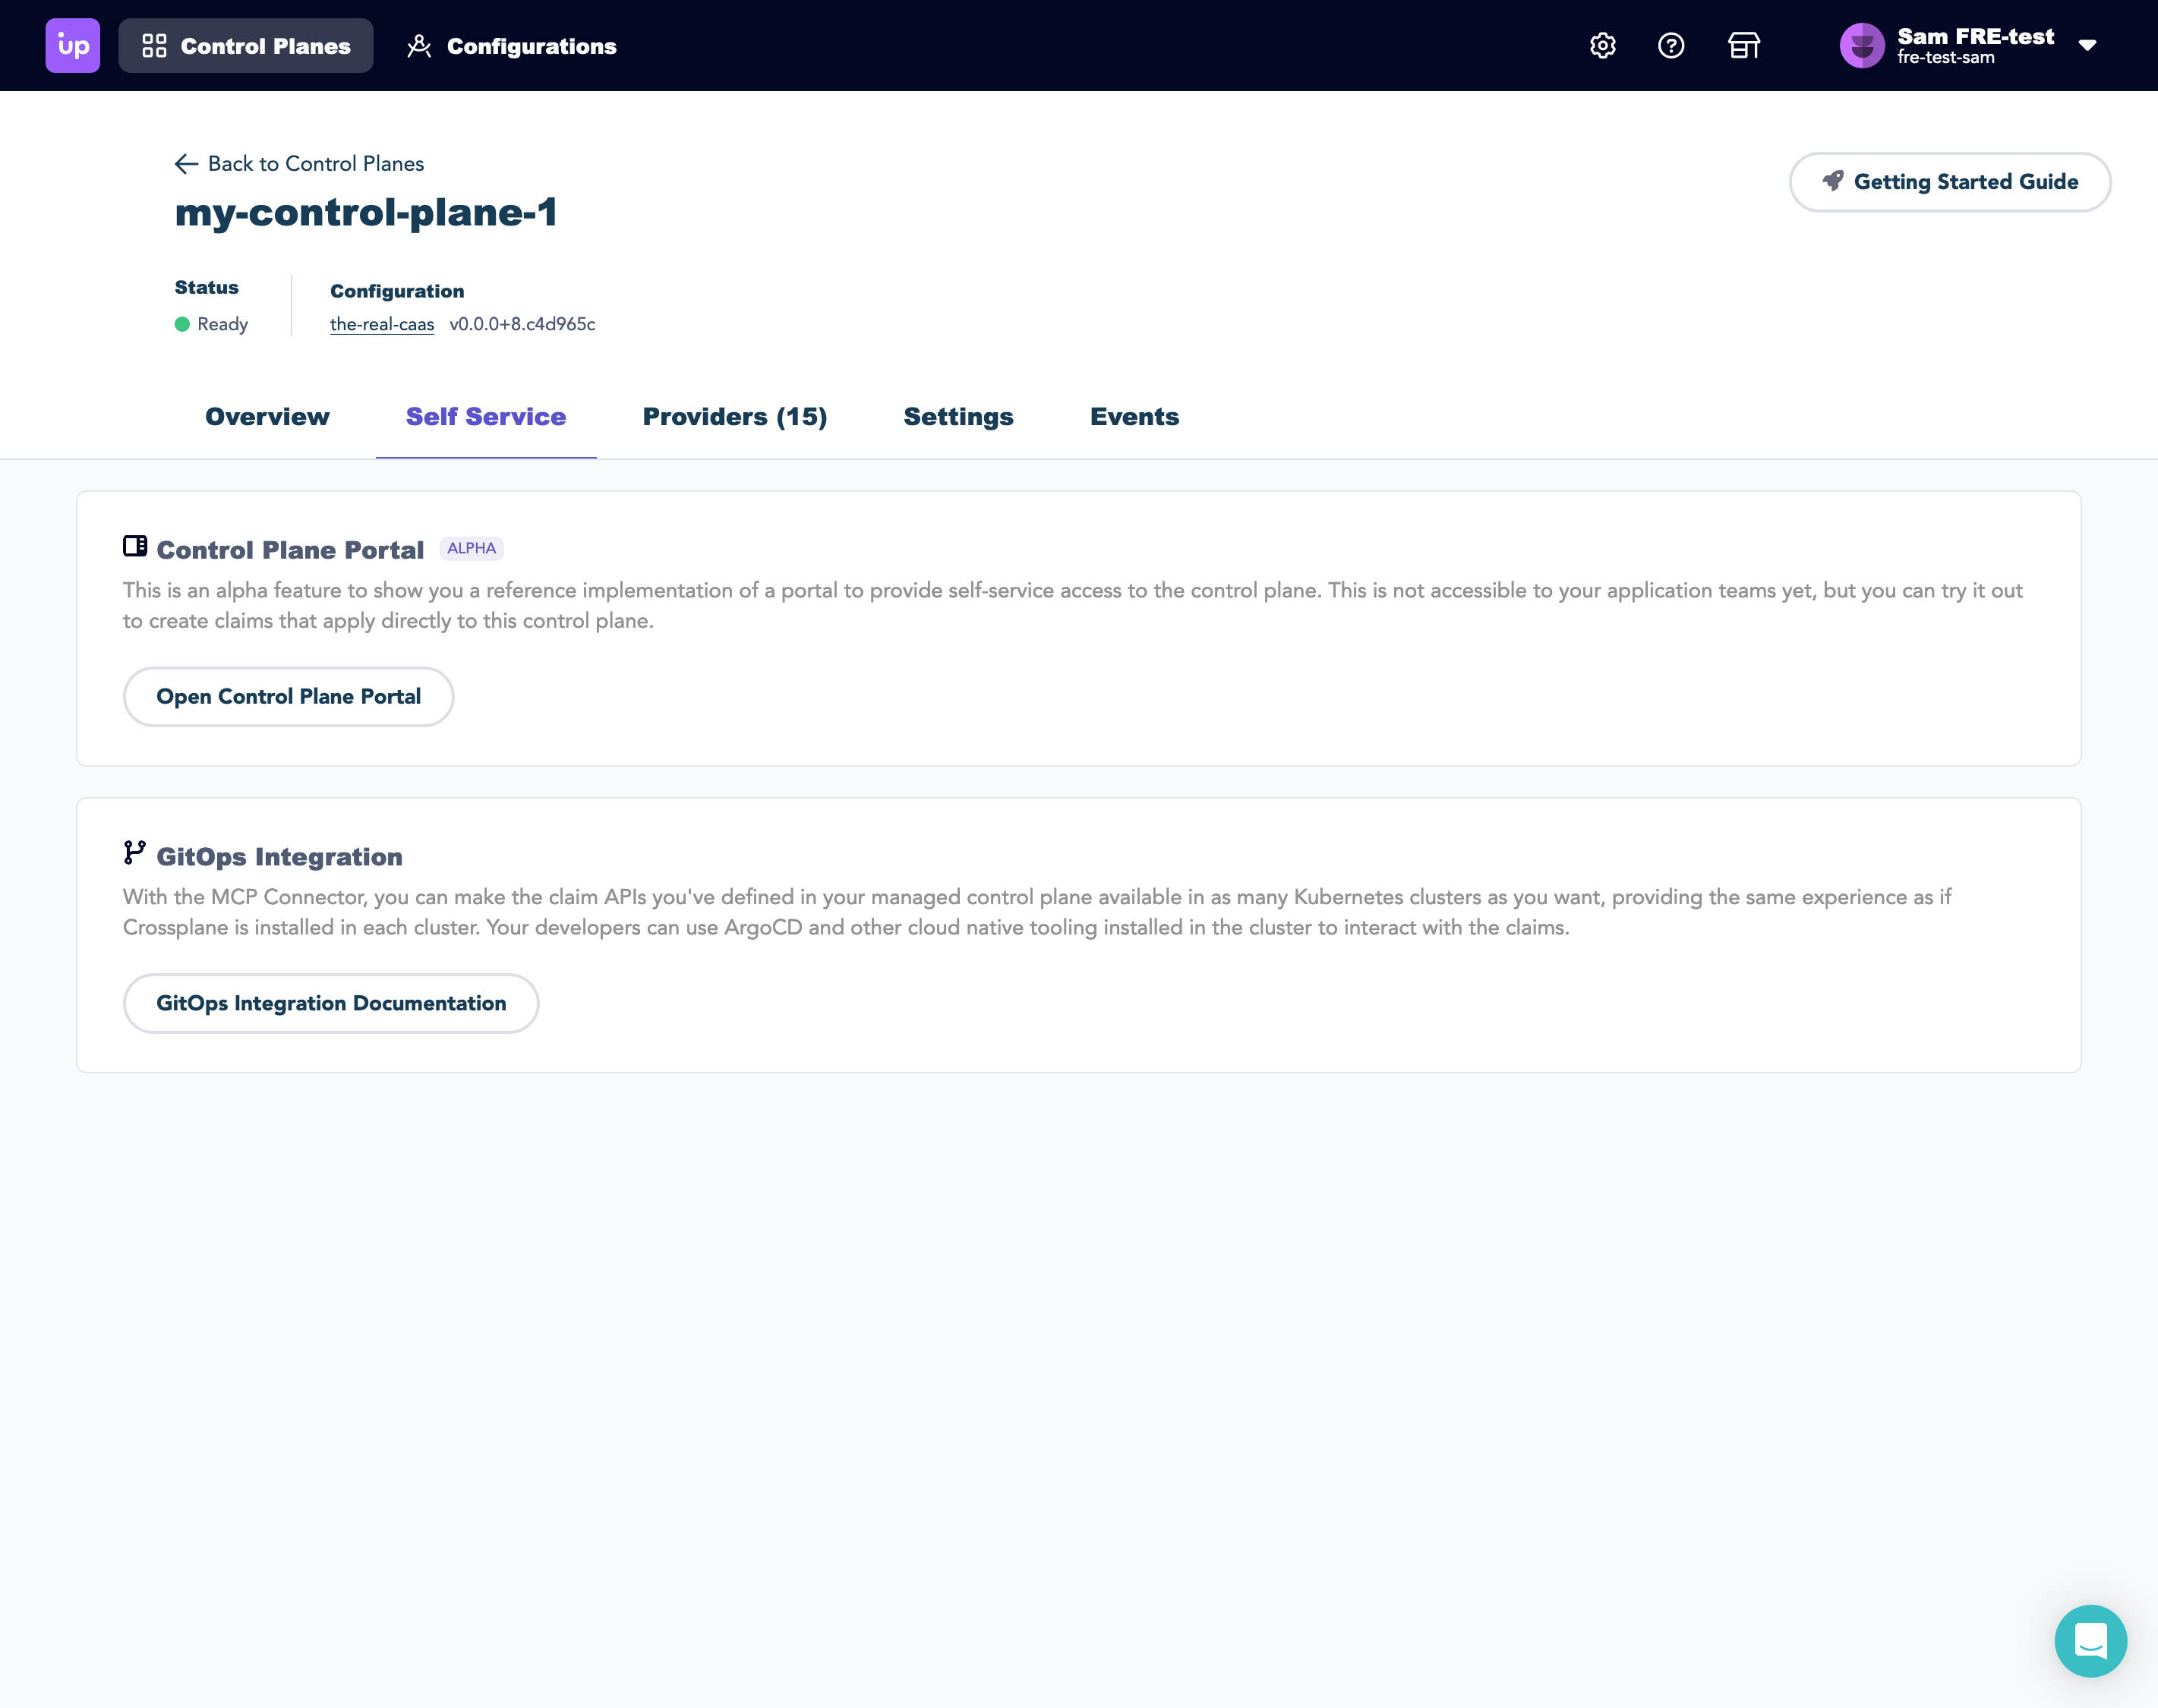
The Control Plane Portal lists the available resources that users can claim in the left-side menu. These resources are your abstracted APIs presented to users.
Select a Cluster resource and then select the Create New button at the top of the page.
The form dynamically generates from the parameters defined in your custom API. Fill in the required fields.
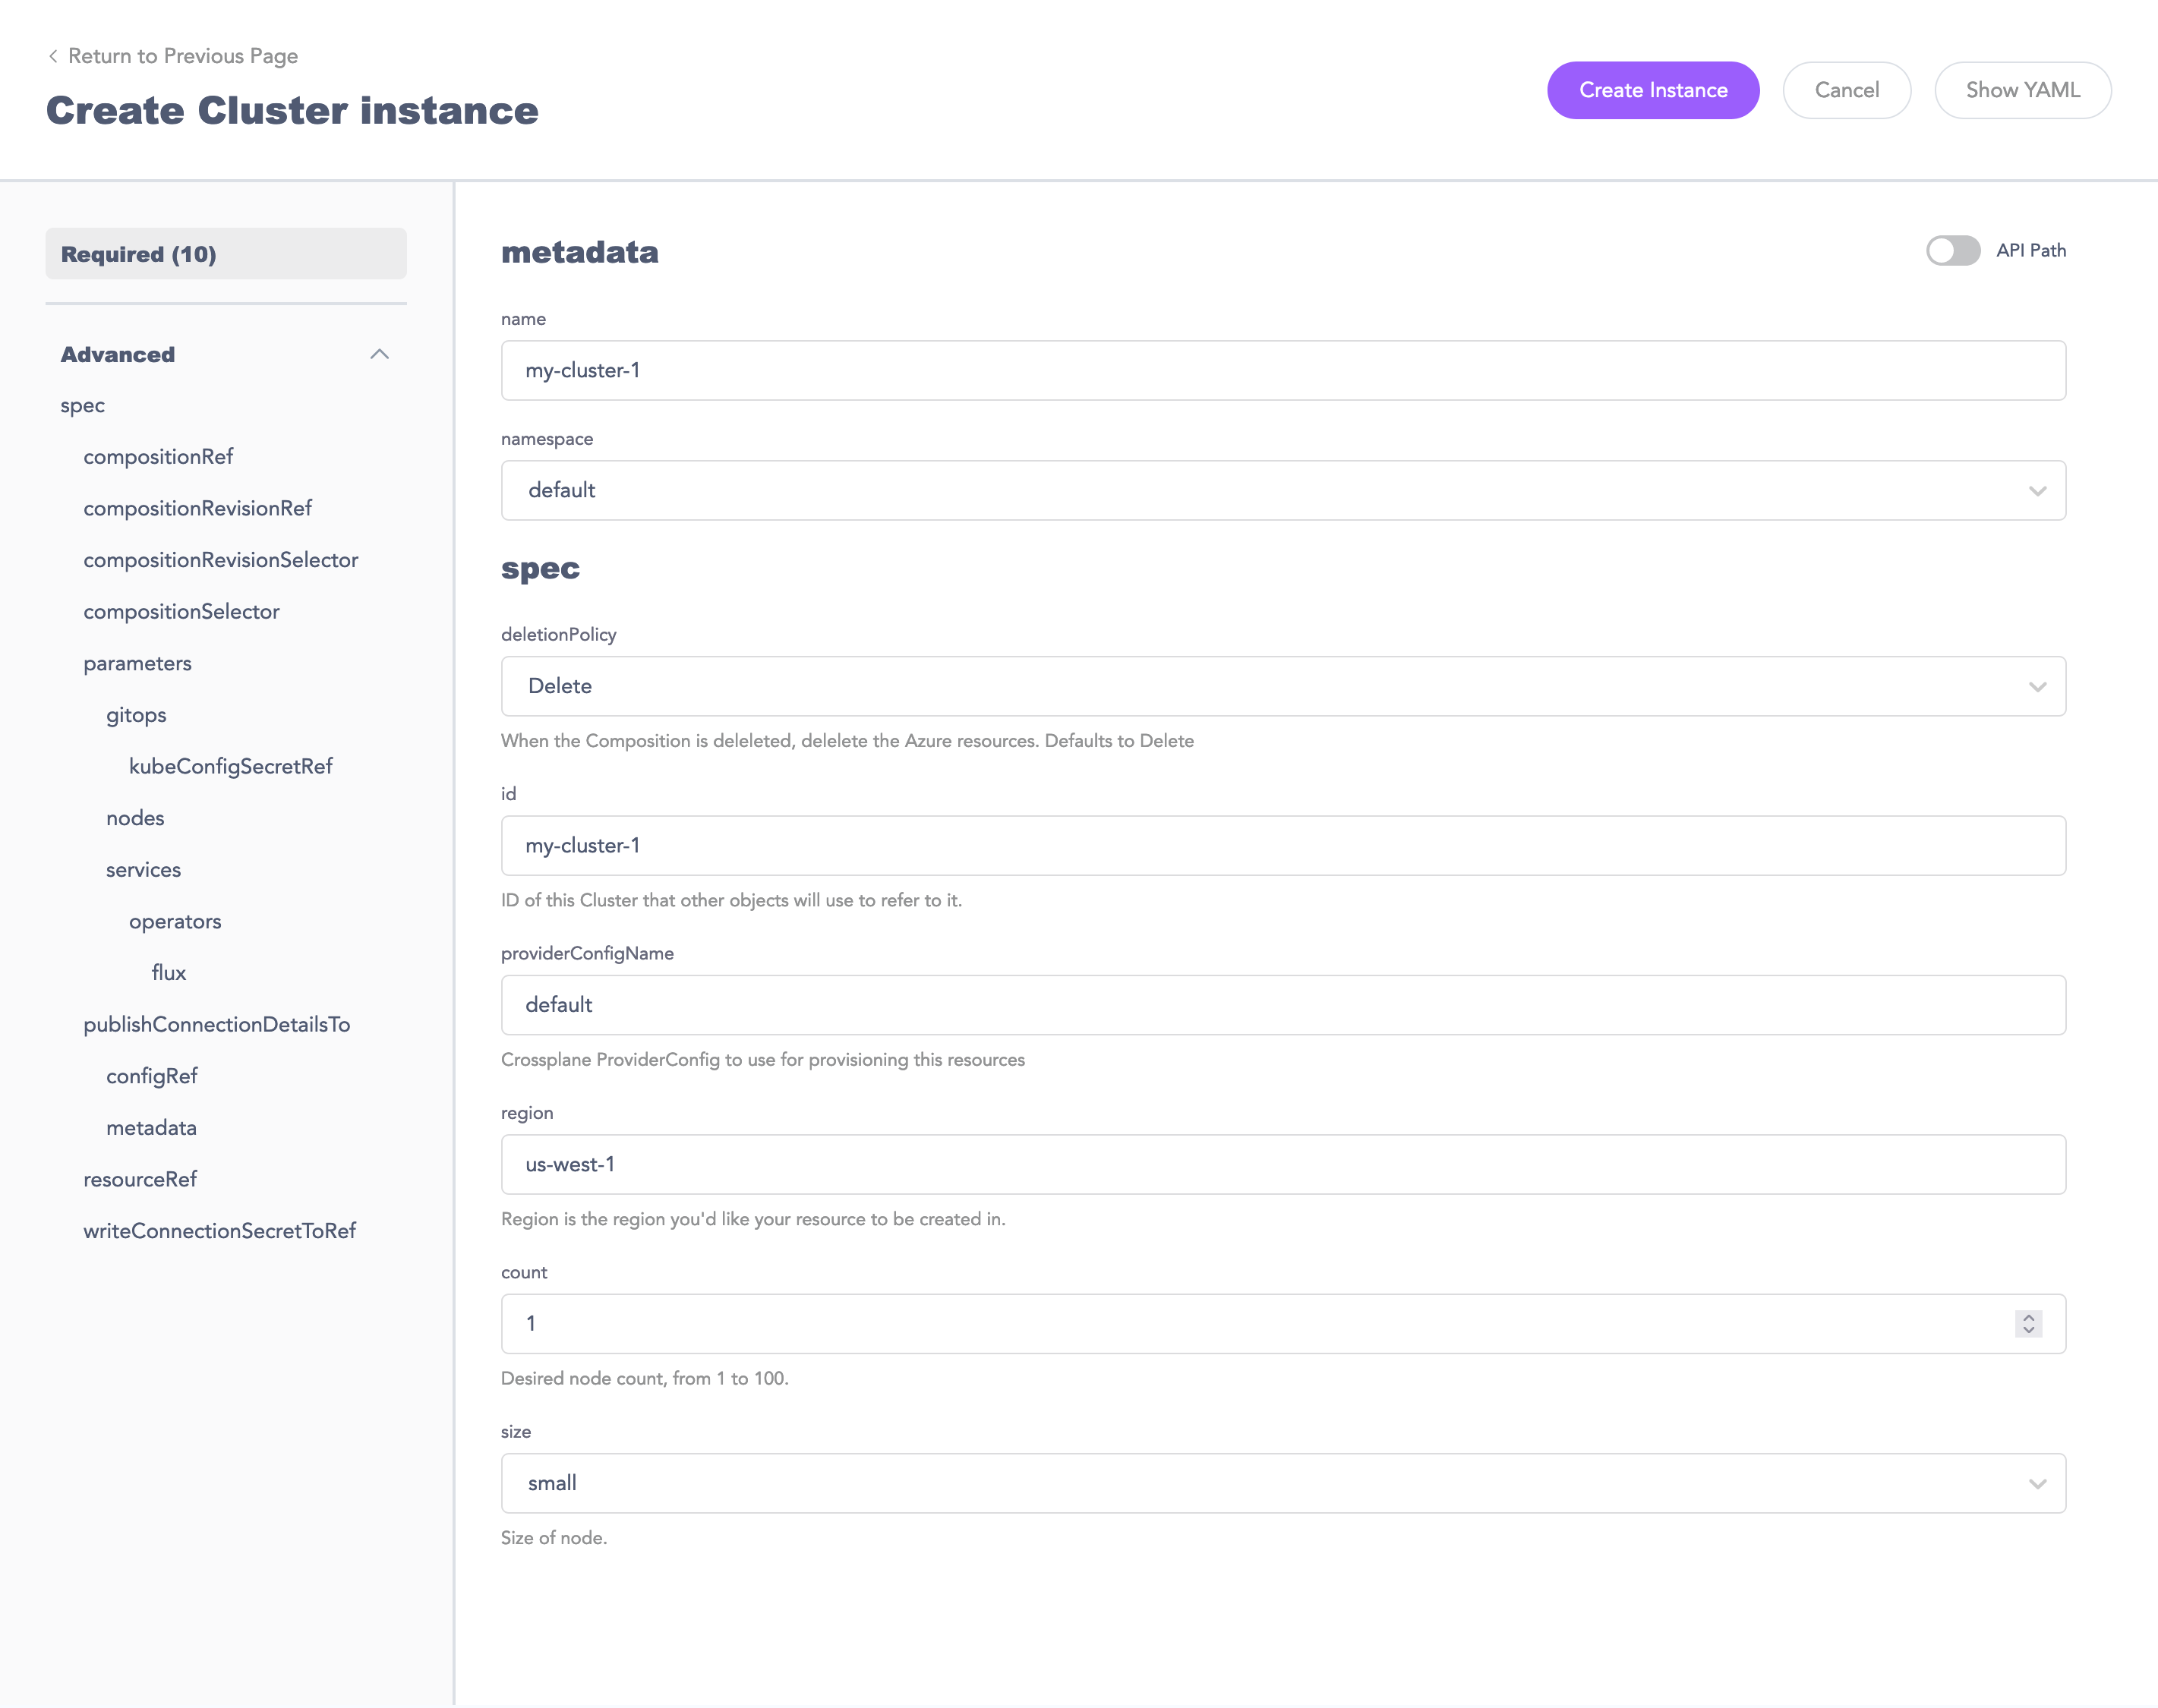
When you Create Instance the portal generates a Crossplane claim.
After creating an instance, the Events section displays logs directly from Kubernetes.
Crossplane commonly generates a Kubernetes error cannot apply composite resource: cannot patch object: Operation cannot be fulfilled that may appear as an Event.
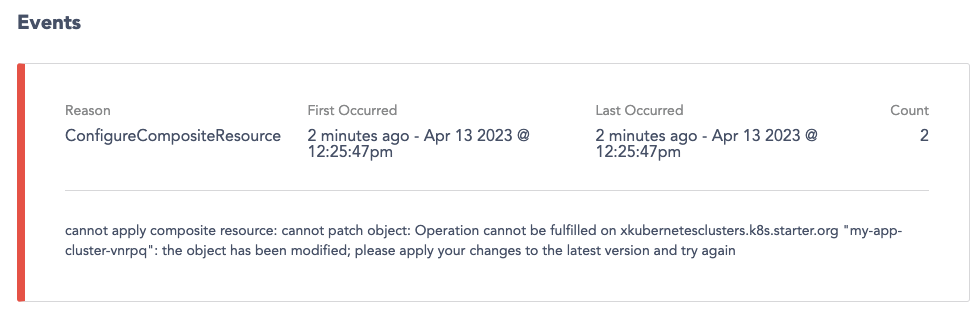
You can ignore this error. For more information about what causes this, read Crossplane issue #2114.
Observe your resources
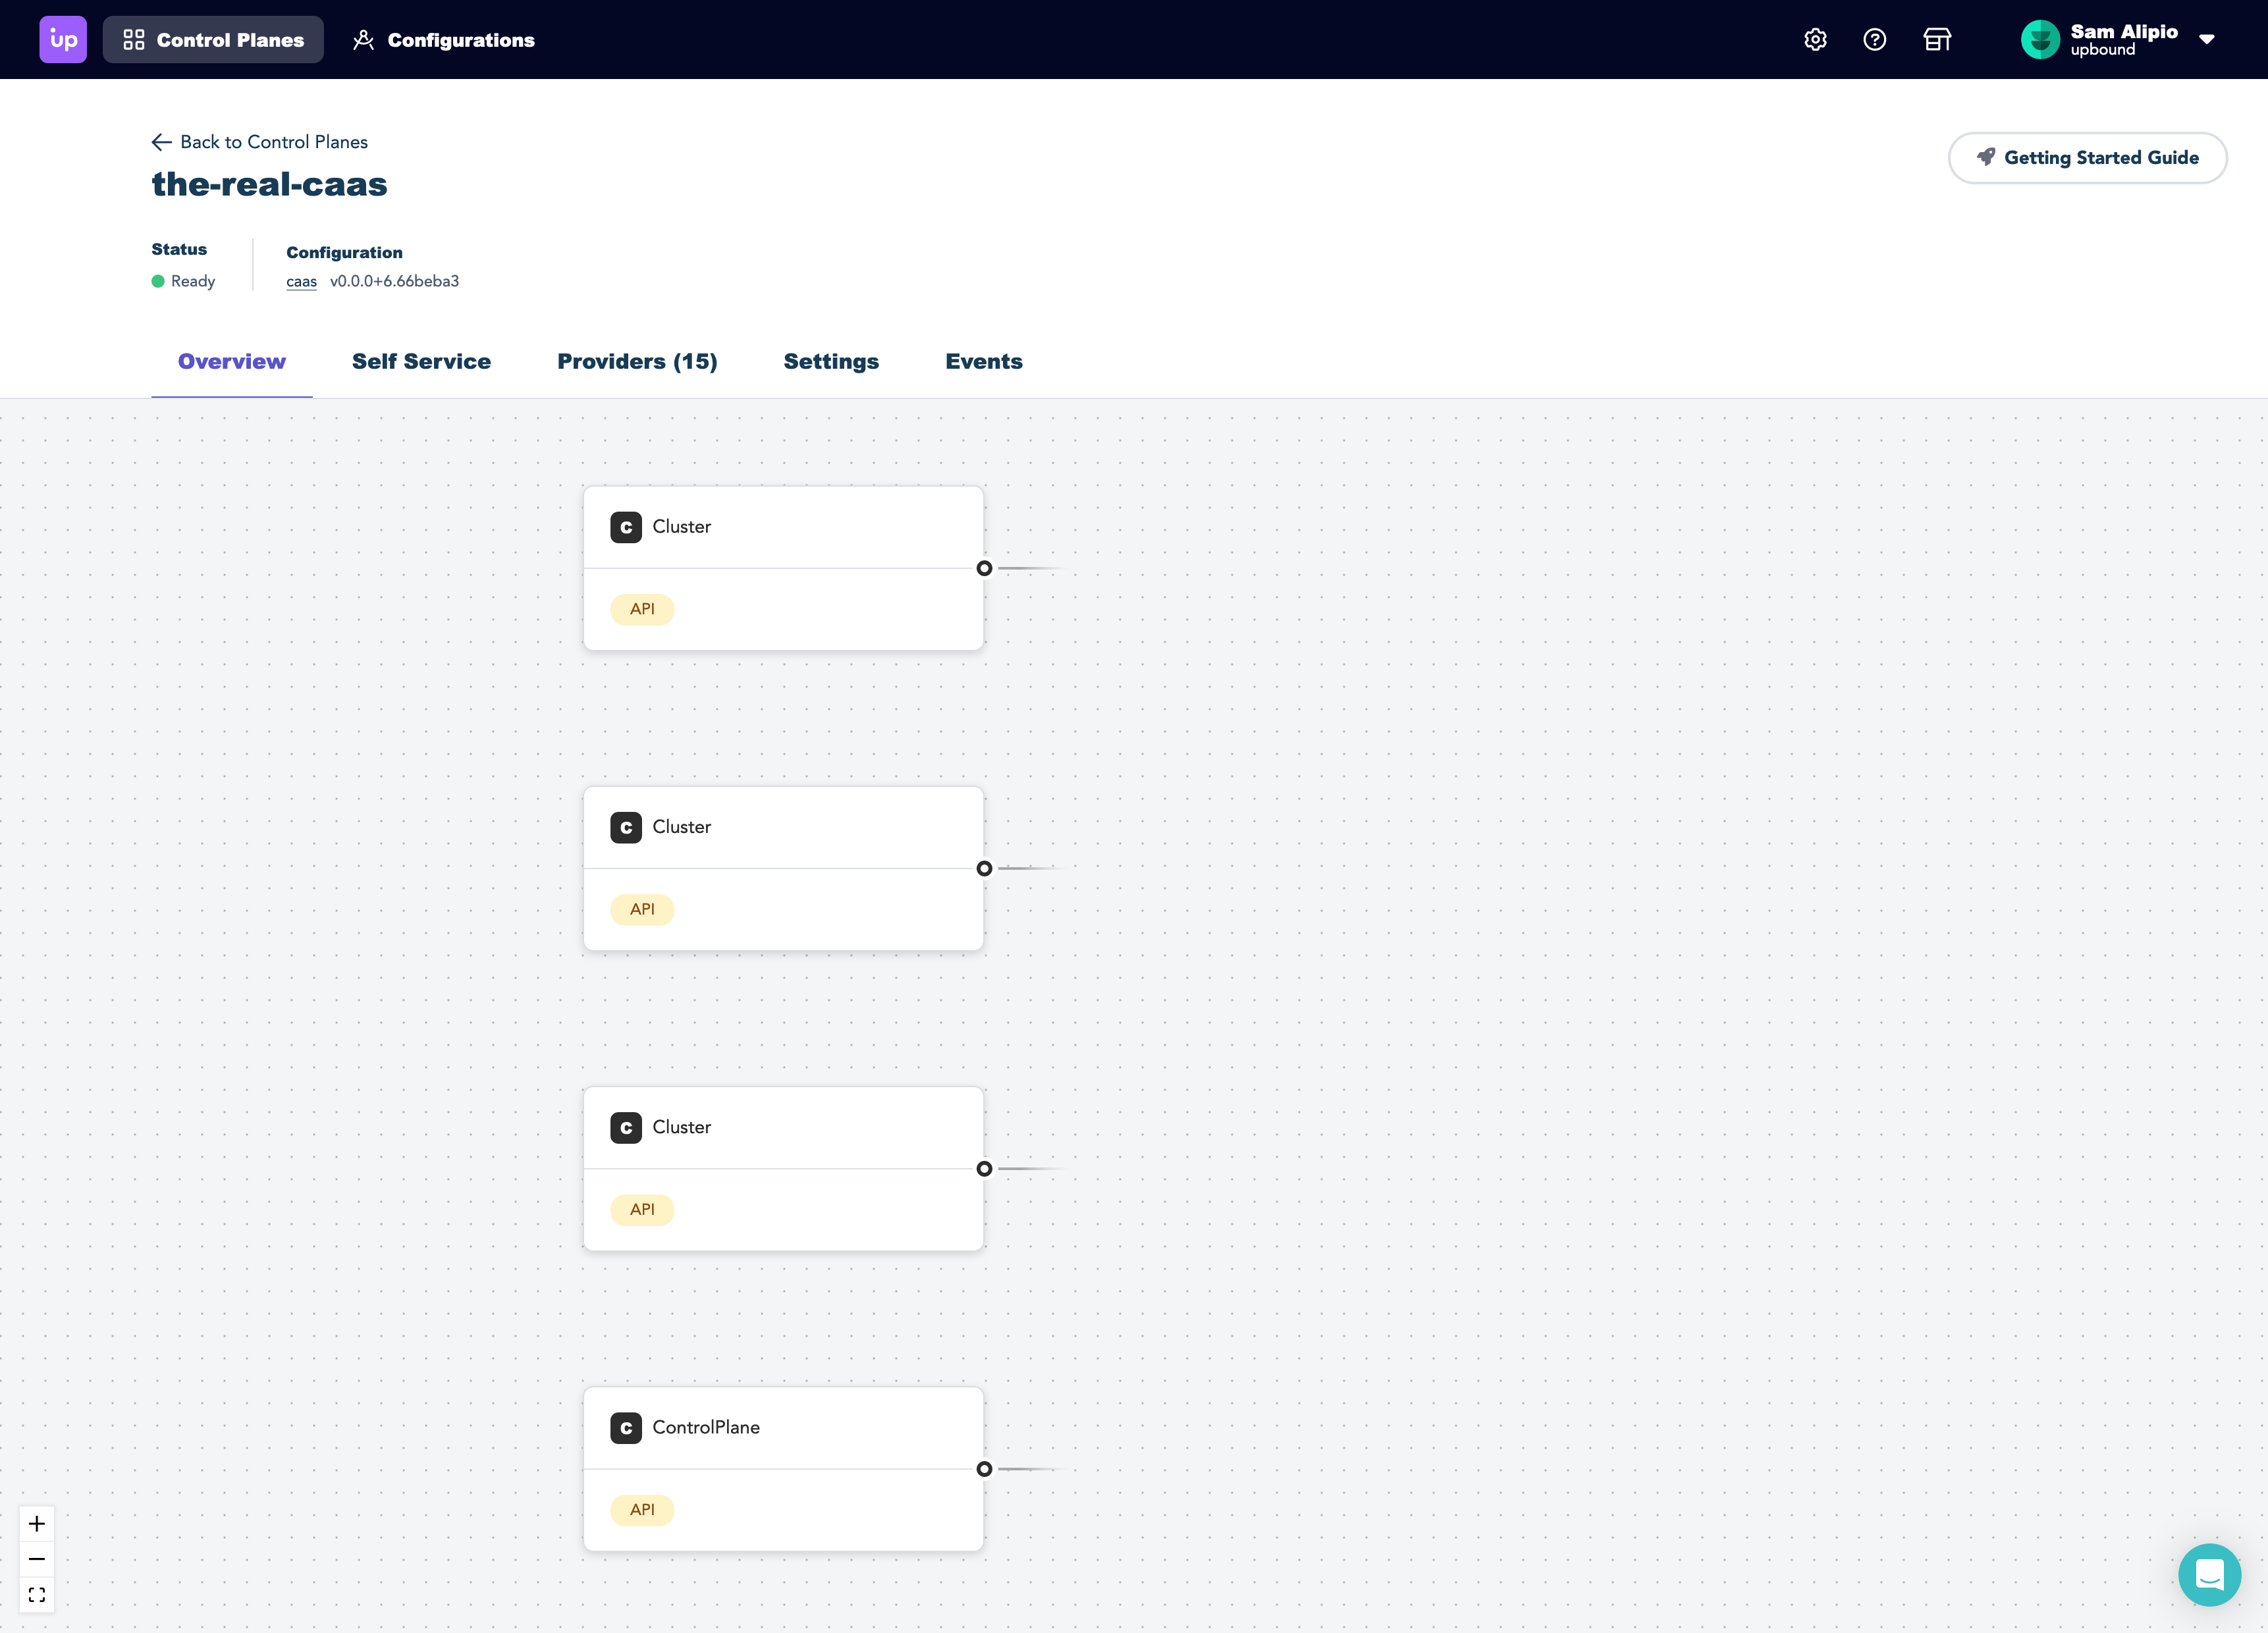
Navigate back to Upbound Console window and to your control plane in the Overview tab.
There’s now a claim card next to the Cluster type card.
Select the claim and Upbound renders the full resource tree that’s getting created and managed by your managed control plane.
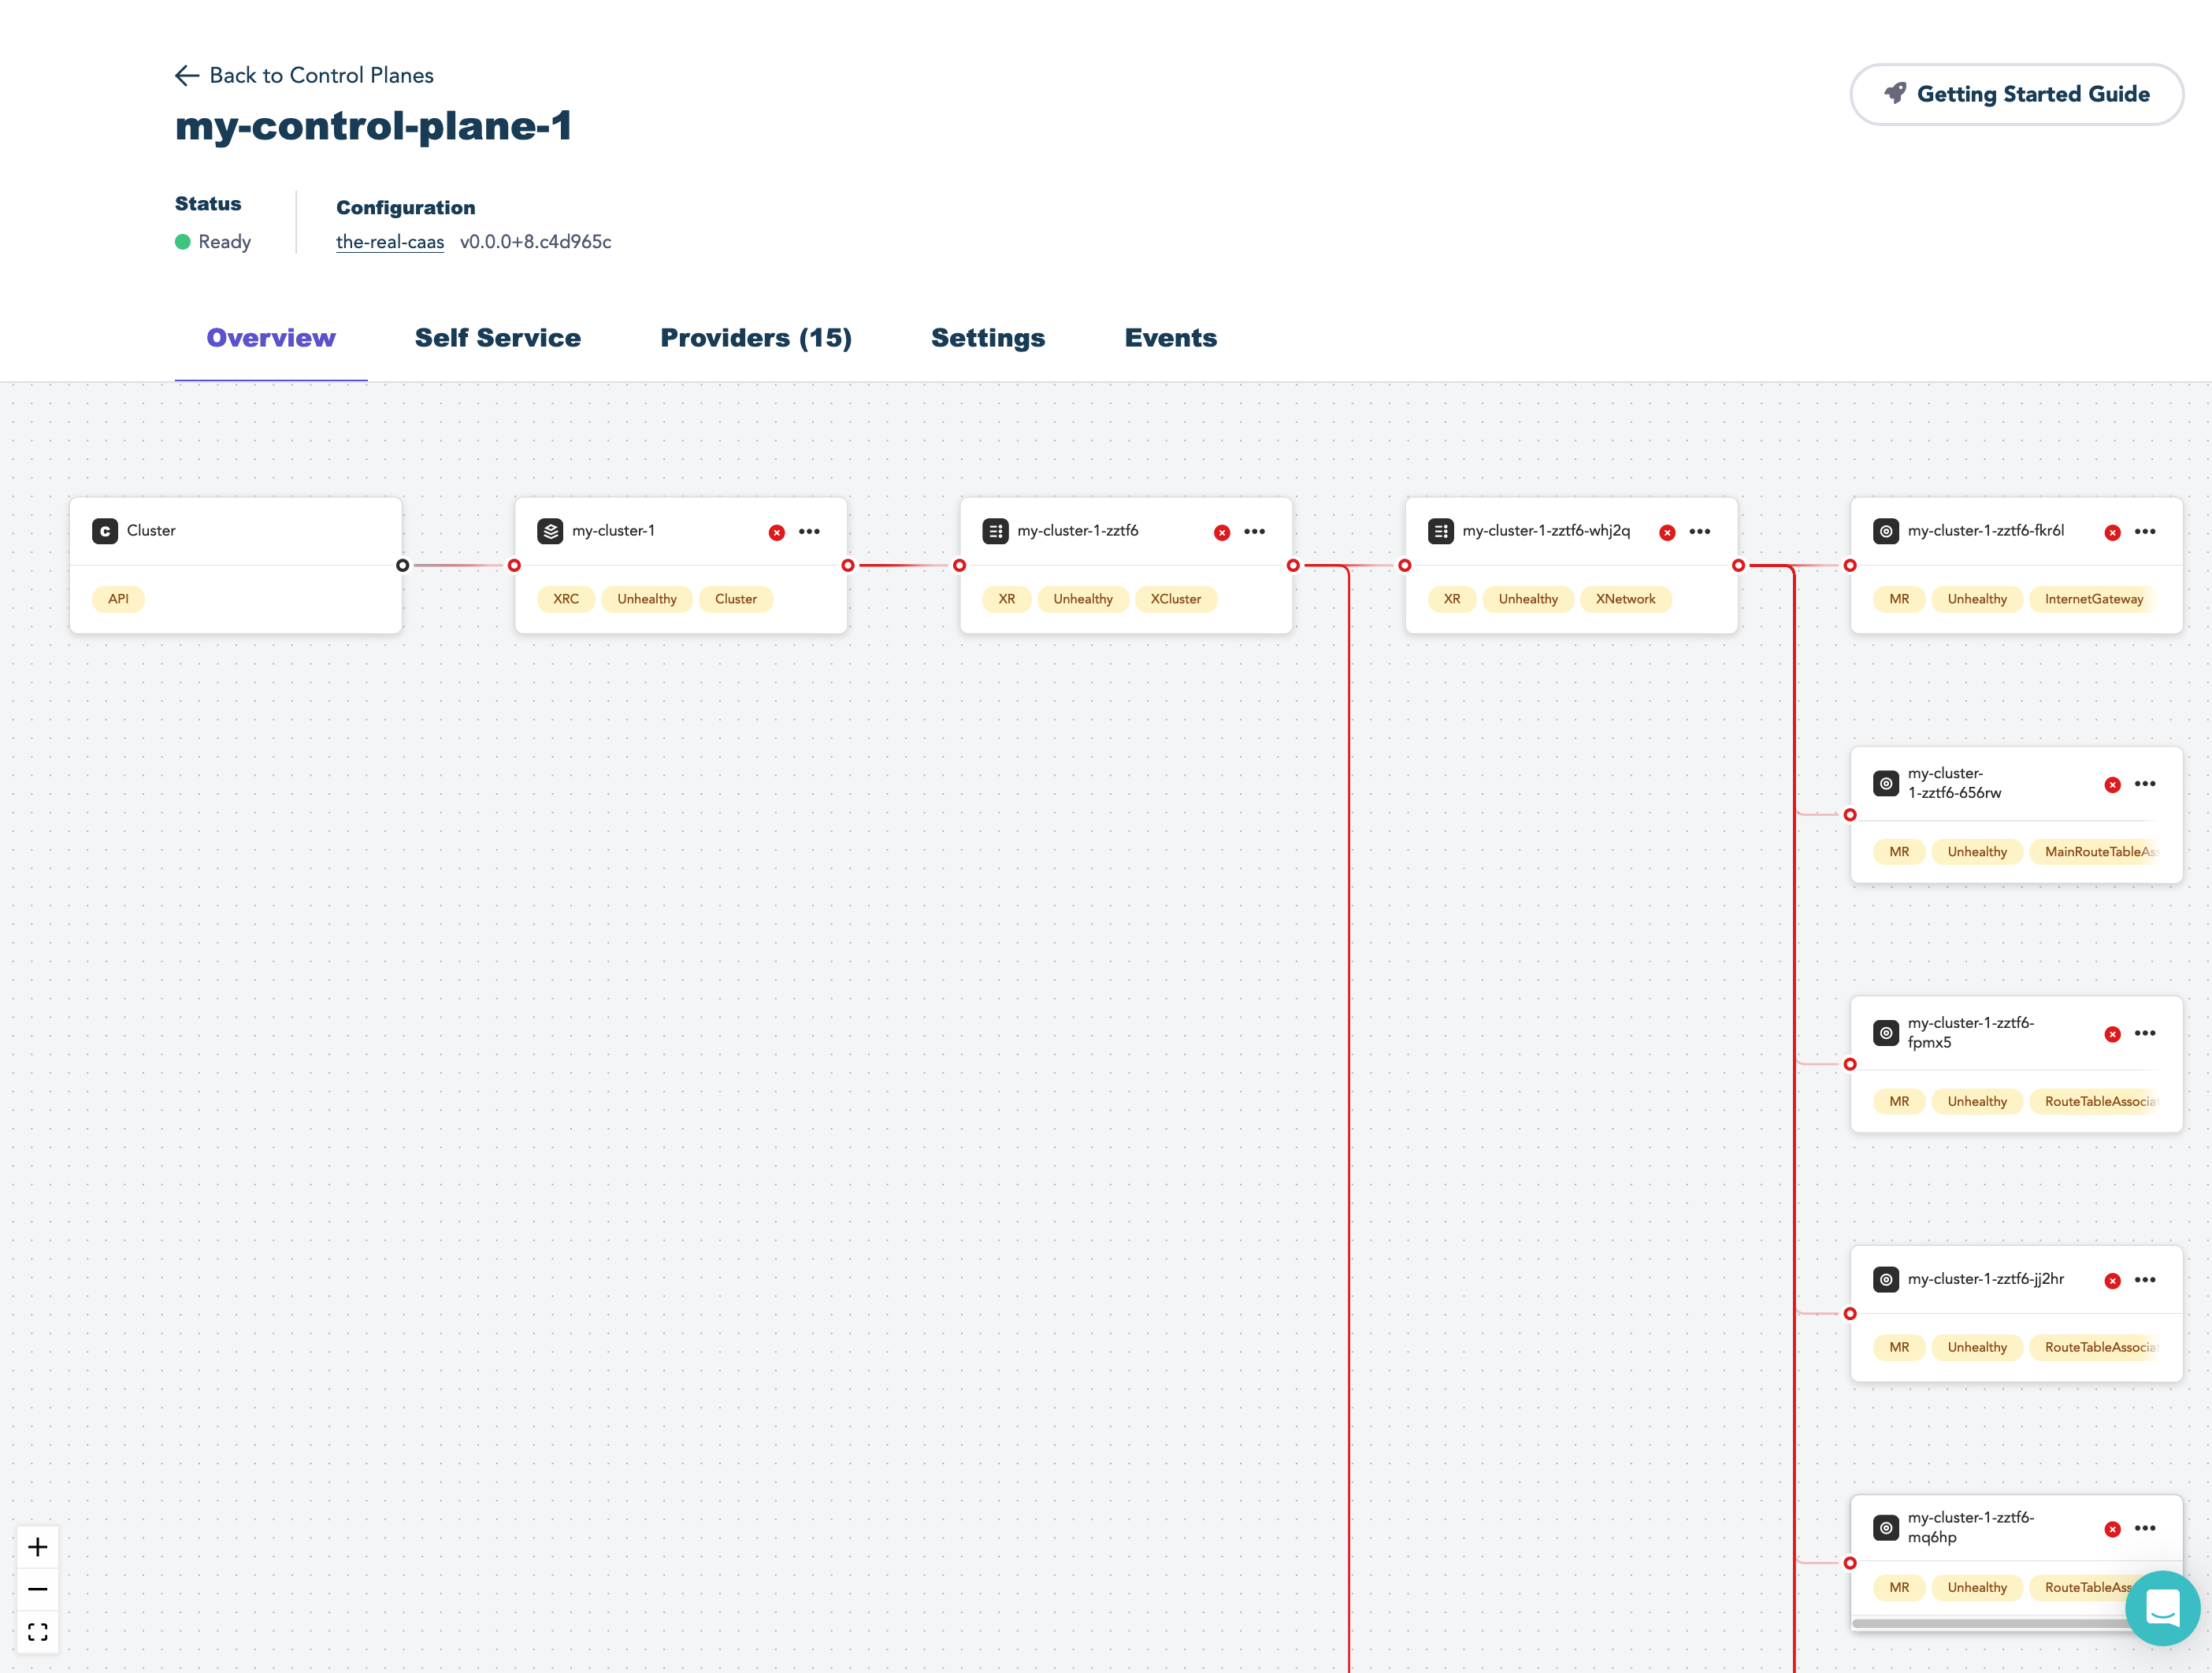
Congratulations, you created your first resources with your MCP.
Next steps
To learn more about the core concepts of Upbound, read the concepts documentation. To learn how to begin building your own platform on Upbound, read the Crossplane Architecture Framework.