Create a control plane project
Now that you have an Upbound account and the up CLI installed, you're ready to create a control plane.
In this quickstart, you will:
- Scaffold a control plane project
- Define your own resource abstraction and templatization
- See the changes immediately
This quickstart teaches how to use Crossplane to build workflows for templating resources and exposing them as simplified resource abstraction. If you just want to manage the lifecycle of resources in an external system through Crossplane and Kubernetes, read Manage external resources with providers
Prerequisites
This quickstart takes around 10 minutes to complete. You should be familiar with YAML or programming in Go, Python, or KCL.
Before beginning, make sure you have:
- The up CLI installed
- A Docker-compatible container runtime installed and running on your system
- A free Community Upbound account
Podman users
If you're using Podman instead of Docker, set the DOCKER_HOST environment variable to the Podman socket before running up commands:
export DOCKER_HOST=unix:///run/user/$(id -u)/podman/podman.sock
Login to Upbound
The up CLI requires you to log in to run local control planes. You can register for a free Community account.
In your terminal, run the following command:
up login
Your browser opens and prompts you to log in to your organization. Once you're authenticated, you can close the page.
Create a control plane project
Crossplane works by letting you define new resource types in Kubernetes that invoke function pipelines to template and generate other resources. Just like any other software project, a control plane project is a source-level representation of your control plane.
Create a control plane project on your machine by running the following command:
up project init --scratch getting-started
This scaffolds a new project in a folder called getting-started. Change your
current working directory to the project root folder:
cd getting-started
Deploy your control plane
In the root directory of your project, build and run your project by running the following:
up project run --local --ingress
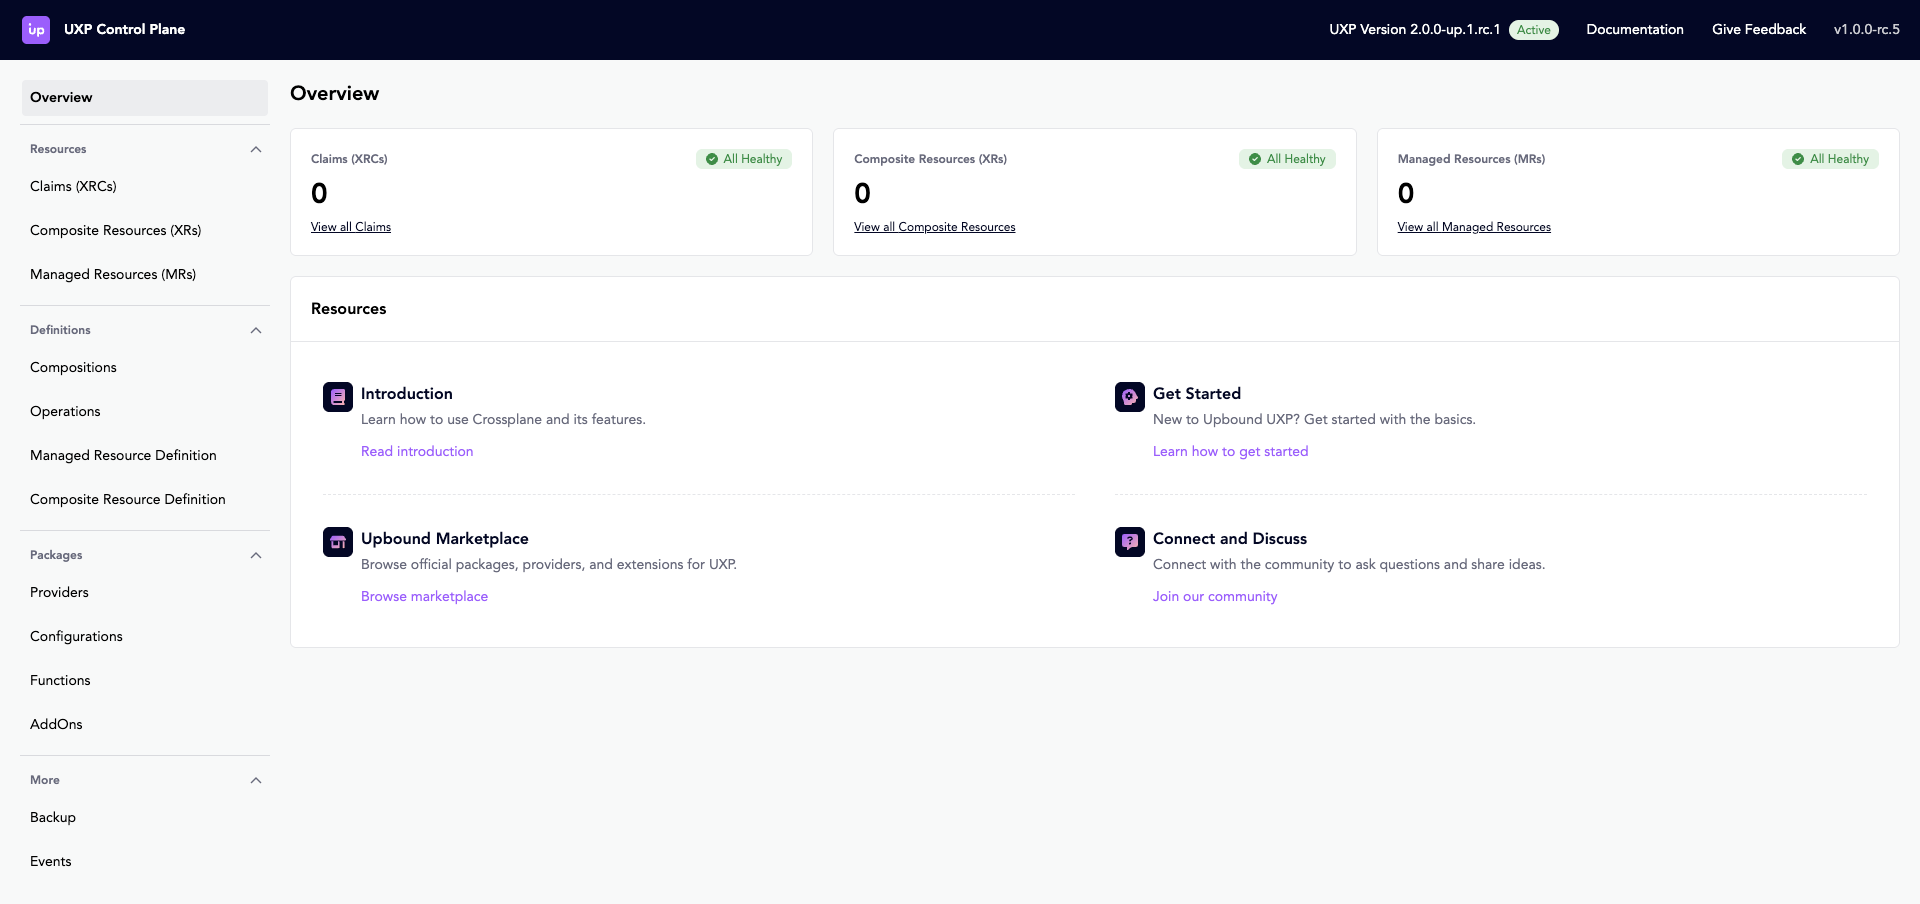
This launches an instance of Upbound Crossplane on your machine, wrapped and deployed in a container. Upbound Crossplane comes bundled with a Web UI.
Define your own resource type
Customize your control plane by defining your own resource type.
Create an example instance of your custom resource type with:
up example generate \
    --api-group platform.example.com \
    --api-version v1alpha1 \
    --kind WebApp\
    --name webapp \
    --scope namespace \
    --namespace default
Open the project in your IDE of choice and replace the contents of the generated file
getting-started/examples/webapp/webapp.yaml with the following:
apiVersion: platform.example.com/v1alpha1
kind: WebApp
metadata:
  name: webapp
  namespace: default
spec:
  parameters:
    image: nginx
    port: 8080
    replicas: 1
    service:
      enabled: true
    ingress:
      enabled: false
    serviceAccount: default
    resources:
      requests:
        memory: "64Mi"
        cpu: "250m"
      limits:
        memory: "1Gi"
        cpu: "1"
status:
    availableReplicas: 1
    url: "http://localhost:8080"
Next, generate the definition files needed by Crossplane with the following commands:
- Go Templates
- Python
- Go
- KCL
up xrd generate examples/webapp/webapp.yaml
up composition generate apis/webapps/definition.yaml
up function generate --language=go-templating compose-resources apis/webapps/composition.yaml
up dependency add --api k8s:v1.33.0
up xrd generate examples/webapp/webapp.yaml
up composition generate apis/webapps/definition.yaml
up function generate --language=python compose-resources apis/webapps/composition.yaml
up dependency add --api k8s:v1.33.0
up xrd generate examples/webapp/webapp.yaml
up composition generate apis/webapps/definition.yaml
up function generate --language=go compose-resources apis/webapps/composition.yaml
up dependency add --api k8s:v1.33.0
up xrd generate examples/webapp/webapp.yaml
up composition generate apis/webapps/definition.yaml
up function generate --language=kcl compose-resources apis/webapps/composition.yaml
up dependency add --api k8s:v1.33.0
You just created your own resource type called WebApp. You generated a function
containing the logic Crossplane uses to determine what should happen when you
create the WebApp.
To define a new resource type with Crossplane, you need to:
- create a CompositeResourceDefinition (XRD), which defines the API schema of your resource type
- create a Composition, which defines the implementation of that API schema.
A Composition is a pipeline of functions, which contain the user-defined logic of your composition.
Open the function definition file at
getting-started/functions/compose-resources/ and replace the contents with the
following:
- Go Templates
- Python
- Go
- KCL
# code: language=yaml
# yaml-language-server: $schema=../../.up/json/models/index.schema.json

---
apiVersion: apps/v1
kind: Deployment
metadata:
  annotations:
    gotemplating.fn.crossplane.io/composition-resource-name: deployment
    {{ if eq (.observed.resources.deployment | getResourceCondition "Available").Status "True" }}
    gotemplating.fn.crossplane.io/ready: "True"
    {{ end }}
  name: {{ .observed.composite.resource.metadata.name }}
  namespace: {{ .observed.composite.resource.metadata.namespace }}
  labels:
    app.kubernetes.io/name: {{ .observed.composite.resource.metadata.name }}
spec:
  replicas: {{ .observed.composite.resource.spec.parameters.replicas }}
  selector:
    matchLabels:
      app.kubernetes.io/name: {{ .observed.composite.resource.metadata.name }}
      app: {{ .observed.composite.resource.metadata.name }}
  strategy: {}
  template:
    metadata:
      labels:
        app.kubernetes.io/name: {{ .observed.composite.resource.metadata.name }}
        app: {{ .observed.composite.resource.metadata.name }}
    spec:
      serviceAccountName: {{ .observed.composite.resource.spec.parameters.serviceAccount }}
      containers:
      - name: {{ .observed.composite.resource.metadata.name }}
        image: {{ .observed.composite.resource.spec.parameters.image }}
        imagePullPolicy: Always
        ports:
        - name: http
          containerPort: {{ .observed.composite.resource.spec.parameters.port }}
          protocol: TCP
        resources:
          requests:
            memory: "64Mi"
            cpu: "250m"
          limits:
            memory: "1Gi"
            cpu: "1"
      restartPolicy: Always
status: {}
# code: language=yaml
# yaml-language-server: $schema=../../.up/json/models/index.schema.json

{{ if .observed.composite.resource.spec.parameters.ingress.enabled }}
---
apiVersion: networking.k8s.io/v1
kind: Ingress
metadata:
  annotations:
    gotemplating.fn.crossplane.io/composition-resource-name: ingress
    {{ if (get (getComposedResource . "ingress").status.loadBalancer.ingress 0).hostname }}
    gotemplating.fn.crossplane.io/ready: "True"
    {{ end }}
    kubernetes.io/ingress.class: alb
    alb.ingress.kubernetes.io/scheme: internet-facing
    alb.ingress.kubernetes.io/target-type: ip
    alb.ingress.kubernetes.io/healthcheck-path: /health
    alb.ingress.kubernetes.io/listen-ports: '[{"HTTP": 80}]'
    alb.ingress.kubernetes.io/target-group-attributes: stickiness.enabled=true,stickiness.lb_cookie.duration_seconds=60
  name: {{ .observed.composite.resource.metadata.name }}
  namespace: {{ .observed.composite.resource.metadata.namespace }}
spec:
  rules:
  - http:
      paths:
      - path: /
        pathType: Prefix
        backend:
          service:
            name: {{ .observed.composite.resource.metadata.name }}
            port:
              number: 80
{{ end }}
# code: language=yaml
# yaml-language-server: $schema=../../.up/json/models/index.schema.json

{{ if .observed.composite.resource.spec.parameters.service.enabled }}
---
apiVersion: v1
kind: Service
metadata:
  annotations:
    gotemplating.fn.crossplane.io/composition-resource-name: service
    {{ if (get (getComposedResource . "service").spec "clusterIP") }}
    gotemplating.fn.crossplane.io/ready: "True"
    {{ end }}
  name: {{ .observed.composite.resource.metadata.name }}
  namespace: {{ .observed.composite.resource.metadata.namespace }}
spec:
  selector:
    app: {{ .observed.composite.resource.metadata.name }}
  ports:
  - name: http
    protocol: TCP
    port: 80
    targetPort: http
status:
  loadBalancer: {}
{{ end }}
# code: language=yaml
# yaml-language-server: $schema=../../.up/json/models/index.schema.json

---
apiVersion: {{ .observed.composite.resource.apiVersion }}
kind: {{ .observed.composite.resource.kind }}
status:
  {{ with $deployment := getComposedResource . "deployment" }}
  deploymentConditions: {{ $deployment.status.conditions | toJson }}
  availableReplicas: {{ $deployment.status.availableReplicas | default 0 }}
  {{ else }}
  deploymentConditions: []
  availableReplicas: 0
  {{ end }}
  {{ with $ingress := getComposedResource . "ingress" }}
  {{ with $hostname := (get $ingress.status.loadBalancer.ingress 0).hostname }}
  url: {{ $hostname | quote }}
  {{ else }}
  url: ""
  {{ end }}
  {{ else }}
  url: ""
  {{ end }}
from crossplane.function import resource
from crossplane.function.proto.v1 import run_function_pb2 as fnv1
from .model.io.k8s.api.apps import v1 as appsv1
from .model.io.k8s.api.core import v1 as corev1
from .model.io.k8s.api.networking import v1 as networkingv1
from .model.com.example.platform.webapp import v1alpha1 as platformv1alpha1
from .model.io.k8s.apimachinery.pkg.apis.core.meta import v1 as coremetav1
def compose(req: fnv1.RunFunctionRequest, rsp: fnv1.RunFunctionResponse):
    oxr = platformv1alpha1.WebApp(**req.observed.composite.resource)
    ocds = req.observed.resources

    # Create a Status object to collect updates
    status = platformv1alpha1.Status()

    deployment = appsv1.Deployment(
        metadata=coremetav1.ObjectMeta(
            name=oxr.metadata.name,
            namespace=oxr.metadata.namespace,
            labels={
                "app.kubernetes.io/name": oxr.metadata.name
            },
        ),
        spec=appsv1.DeploymentSpec(
            replicas=oxr.spec.parameters.replicas,
            selector=coremetav1.LabelSelector(
                matchLabels={
                    "app.kubernetes.io/name": oxr.metadata.name,
                    "app": oxr.metadata.name
                }
            ),
            template=corev1.PodTemplateSpec(
                metadata=coremetav1.ObjectMeta(
                    labels={
                        "app.kubernetes.io/name": oxr.metadata.name,
                        "app": oxr.metadata.name
                    }
                ),
                spec=corev1.PodSpec(
                    serviceAccountName=oxr.spec.parameters.serviceAccount,
                    containers=[
                        corev1.Container(
                            name=oxr.metadata.name,
                            image=oxr.spec.parameters.image,
                            imagePullPolicy="Always",
                            ports=[
                                corev1.ContainerPort(
                                    name="http",
                                    containerPort=int(oxr.spec.parameters.port),
                                    protocol="TCP",
                                )
                            ],
                            resources=corev1.ResourceRequirements(
                                requests={
                                    "memory": "64Mi",
                                    "cpu": "250m"
                                },
                                limits={
                                    "memory": "1Gi",
                                    "cpu": "1"
                                }
                            )
                        )
                    ],
                    restartPolicy="Always"
                )
            )
        )
    )

    if "deployment" in ocds:
        observed_deployment = appsv1.Deployment(**ocds["deployment"].resource)
        if observed_deployment.status and observed_deployment.status.conditions:
            for condition in observed_deployment.status.conditions:
                if condition.type == "Available" and condition.status == "True":
                    rsp.desired.resources["deployment"].ready = True
                    break

    resource.update(rsp.desired.resources["deployment"], deployment)

    if oxr.spec.parameters.service and oxr.spec.parameters.service.enabled:
        service = corev1.Service(
            metadata=coremetav1.ObjectMeta(
                name=oxr.metadata.name,
                namespace=oxr.metadata.namespace,
            ),
            spec=corev1.ServiceSpec(
                selector={
                    "app": oxr.metadata.name
                },
                ports=[
                    corev1.ServicePort(
                        name="http",
                        protocol="TCP",
                        port=80,
                        targetPort="http"
                    )
                ]
            )
        )

        if "service" in ocds:
            observed_service = corev1.Service(**ocds["service"].resource)
            if observed_service.spec and observed_service.spec.clusterIP:
                rsp.desired.resources["service"].ready = True
        resource.update(rsp.desired.resources["service"], service)

    if oxr.spec.parameters.ingress and oxr.spec.parameters.ingress.enabled:
        ingress = networkingv1.Ingress(
            metadata=coremetav1.ObjectMeta(
                name=oxr.metadata.name,
                namespace=oxr.metadata.namespace,
                annotations={
                    "kubernetes.io/ingress.class": "alb",
                    "alb.ingress.kubernetes.io/scheme": "internet-facing",
                    "alb.ingress.kubernetes.io/target-type": "ip",
                    "alb.ingress.kubernetes.io/healthcheck-path": "/health",
                    "alb.ingress.kubernetes.io/listen-ports": '[{"HTTP": 80}]',
                    "alb.ingress.kubernetes.io/target-group-attributes": "stickiness.enabled=true,stickiness.lb_cookie.duration_seconds=60"
                }
            ),
            spec=networkingv1.IngressSpec(
                rules=[
                    networkingv1.IngressRule(
                        http=networkingv1.HTTPIngressRuleValue(
                            paths=[
                                networkingv1.HTTPIngressPath(
                                    path="/",
                                    pathType="Prefix",
                                    backend=networkingv1.IngressBackend(
                                        service=networkingv1.IngressServiceBackend(
                                            name=oxr.metadata.name,
                                            port=networkingv1.ServiceBackendPort(
                                                number=80
                                            )
                                        )
                                    )
                                )
                            ]
                        )
                    )
                ]
            )
        )

        if "ingress" in ocds:
            observed_ingress = networkingv1.Ingress(**ocds["ingress"].resource)
            if (observed_ingress.status and
                observed_ingress.status.loadBalancer and
                observed_ingress.status.loadBalancer.ingress and
                len(observed_ingress.status.loadBalancer.ingress) > 0 and
                observed_ingress.status.loadBalancer.ingress[0].hostname):
                rsp.desired.resources["ingress"].ready = True
        resource.update(rsp.desired.resources["ingress"], ingress)

    # Set status with defaults
    if "deployment" in ocds:
        observed_deployment = appsv1.Deployment(**ocds["deployment"].resource)
        if observed_deployment.status and observed_deployment.status.conditions:
            status.deploymentConditions = []
            for condition in observed_deployment.status.conditions:
                condition_dict = condition.model_dump(exclude_none=True)
                # Convert datetime objects to ISO format strings
                if 'lastTransitionTime' in condition_dict and condition_dict['lastTransitionTime']:
                    condition_dict['lastTransitionTime'] = condition_dict['lastTransitionTime'].isoformat()
                if 'lastUpdateTime' in condition_dict and condition_dict['lastUpdateTime']:
                    condition_dict['lastUpdateTime'] = condition_dict['lastUpdateTime'].isoformat()
                status.deploymentConditions.append(condition_dict)
        else:
            status.deploymentConditions = []
        status.availableReplicas = observed_deployment.status.availableReplicas if observed_deployment.status and observed_deployment.status.availableReplicas else 0
    else:
        status.deploymentConditions = []
        status.availableReplicas = 0

    if "ingress" in ocds:
        observed_ingress = networkingv1.Ingress(**ocds["ingress"].resource)
        status.url = (
            observed_ingress.status.loadBalancer.ingress[0].hostname
            if (observed_ingress.status and
                observed_ingress.status.loadBalancer and
                observed_ingress.status.loadBalancer.ingress and
                len(observed_ingress.status.loadBalancer.ingress) > 0 and
                observed_ingress.status.loadBalancer.ingress[0].hostname)
            else ""
        )
    else:
        status.url = ""

    resource.update(rsp.desired.composite, {"status": status.model_dump(exclude_none=True)})
package main

import (
	"context"
	"encoding/json"

	"dev.upbound.io/models/com/example/platform/v1alpha1"
	appsv1 "dev.upbound.io/models/io/k8s/apps/v1"
	coremetav1 "dev.upbound.io/models/io/k8s/core/meta/v1"
	corev1 "dev.upbound.io/models/io/k8s/core/v1"
	networkingv1 "dev.upbound.io/models/io/k8s/networking/v1"
	resourcev1 "dev.upbound.io/models/io/k8s/resource/v1"
	"github.com/crossplane/crossplane-runtime/pkg/logging"
	"github.com/crossplane/function-sdk-go/errors"
	fnv1 "github.com/crossplane/function-sdk-go/proto/v1"
	"github.com/crossplane/function-sdk-go/request"
	"github.com/crossplane/function-sdk-go/resource"
	"github.com/crossplane/function-sdk-go/resource/composed"
	"github.com/crossplane/function-sdk-go/response"
	"k8s.io/utils/ptr"
)

// Function is your composition function.
type Function struct {
	fnv1.UnimplementedFunctionRunnerServiceServer

	log logging.Logger
}

// RunFunction runs the Function.
func (f *Function) RunFunction(_ context.Context, req *fnv1.RunFunctionRequest) (*fnv1.RunFunctionResponse, error) {
	f.log.Info("Running function", "tag", req.GetMeta().GetTag())
	rsp := response.To(req, response.DefaultTTL)

	observedComposite, err := request.GetObservedCompositeResource(req)
	if err != nil {
		response.Fatal(rsp, errors.Wrap(err, "cannot get xr"))
		return rsp, nil
	}

	observedComposed, err := request.GetObservedComposedResources(req)
	if err != nil {
		response.Fatal(rsp, errors.Wrap(err, "cannot get observed resources"))
		return rsp, nil
	}

	var xr v1alpha1.WebApp
	if err := convertViaJSON(&xr, observedComposite.Resource); err != nil {
		response.Fatal(rsp, errors.Wrap(err, "cannot convert xr"))
		return rsp, nil
	}

	params := xr.Spec.Parameters
	if params == nil {
		response.Fatal(rsp, errors.New("missing parameters"))
		return rsp, nil
	}

	// We'll collect our desired composed resources into this map, then convert
	// them to the SDK's types and set them in the response when we return.
	desiredComposed := make(map[resource.Name]any)
	defer func() {
		desiredComposedResources, err := request.GetDesiredComposedResources(req)
		if err != nil {
			response.Fatal(rsp, errors.Wrap(err, "cannot get desired resources"))
			return
		}

		for name, obj := range desiredComposed {
			c := composed.New()
			if err := convertViaJSON(c, obj); err != nil {
				response.Fatal(rsp, errors.Wrapf(err, "cannot convert %s to unstructured", name))
				return
			}
			dc := &resource.DesiredComposed{Resource: c}

			// Check if this resource should be marked as ready
			if c.GetAnnotations()["go.upbound.io/ready"] == "True" {
				dc.Ready = resource.ReadyTrue
			}

			desiredComposedResources[name] = dc
		}

		if err := response.SetDesiredComposedResources(rsp, desiredComposedResources); err != nil {
			response.Fatal(rsp, errors.Wrap(err, "cannot set desired resources"))
			return
		}
	}()

	// Create Deployment
	deployment := &appsv1.Deployment{
		APIVersion: ptr.To(appsv1.DeploymentAPIVersionAppsV1),
		Kind:       ptr.To(appsv1.DeploymentKindDeployment),
		Metadata: &coremetav1.ObjectMeta{
			Name:      xr.Metadata.Name,
			Namespace: xr.Metadata.Namespace,
			Labels: &map[string]string{
				"app.kubernetes.io/name": *xr.Metadata.Name,
			},
		},
		Spec: &appsv1.DeploymentSpec{
			Replicas: ptr.To(int32(*params.Replicas)),
			Selector: &coremetav1.LabelSelector{
				MatchLabels: &map[string]string{
					"app.kubernetes.io/name": *xr.Metadata.Name,
					"app":                    *xr.Metadata.Name,
				},
			},
			// ToDo(haarchri): remove this
			Strategy: &appsv1.IoK8SApiAppsV1DeploymentStrategy{},
			Template: &corev1.PodTemplateSpec{
				Metadata: &coremetav1.ObjectMeta{
					Labels: &map[string]string{
						"app.kubernetes.io/name": *xr.Metadata.Name,
						"app":                    *xr.Metadata.Name,
					},
				},
				Spec: &corev1.PodSpec{
					ServiceAccountName: params.ServiceAccount,
					Containers: &[]corev1.Container{{
						Name:            xr.Metadata.Name,
						Image:           params.Image,
						ImagePullPolicy: ptr.To("Always"),
						Ports: &[]corev1.ContainerPort{{
							Name:          ptr.To("http"),
							ContainerPort: ptr.To(int32(*params.Port)),
							Protocol:      ptr.To("TCP"),
						}},
						Resources: &corev1.ResourceRequirements{
							Requests: &map[string]resourcev1.Quantity{
								"memory": "64Mi",
								"cpu":    "250m",
							},
							Limits: &map[string]resourcev1.Quantity{
								"memory": "1Gi",
								"cpu":    "1",
							},
						},
					}},
					RestartPolicy: ptr.To("Always"),
				},
			},
		},
		// ToDo(haarchri): remove this
		Status: &appsv1.IoK8SApiAppsV1DeploymentStatus{},
	}

	// Check if deployment is ready
	observedDeployment, ok := observedComposed["deployment"]
	if ok && observedDeployment.Resource != nil {
		var obsDeployment appsv1.Deployment
		if err := convertViaJSON(&obsDeployment, observedDeployment.Resource); err == nil {
			if obsDeployment.Status != nil && obsDeployment.Status.Conditions != nil {
				for _, c := range *obsDeployment.Status.Conditions {
					if c.Type != nil && *c.Type == "Available" &&
						c.Status != nil && *c.Status == "True" {
						if deployment.Metadata.Annotations == nil {
							deployment.Metadata.Annotations = &map[string]string{}
						}
						(*deployment.Metadata.Annotations)["go.upbound.io/ready"] = "True"
						break
					}
				}
			}
		}
	}
	desiredComposed["deployment"] = deployment

	// Create Service if enabled
	if params.Service != nil && params.Service.Enabled != nil && *params.Service.Enabled {
		service := &corev1.Service{
			APIVersion: ptr.To(corev1.ServiceAPIVersionV1),
			Kind:       ptr.To(corev1.ServiceKindService),
			Metadata: &coremetav1.ObjectMeta{
				Name:      xr.Metadata.Name,
				Namespace: xr.Metadata.Namespace,
			},
			Spec: &corev1.ServiceSpec{
				Selector: &map[string]string{
					"app": *xr.Metadata.Name,
				},
				Ports: &[]corev1.ServicePort{{
					Name:       ptr.To("http"),
					Protocol:   ptr.To("TCP"),
					Port:       ptr.To(int32(80)),
					TargetPort: ptr.To("http"),
				}},
			},
			// ToDo(haarchri): remove this
			Status: &corev1.ServiceStatus{
				LoadBalancer: &corev1.LoadBalancerStatus{},
			},
		}

		// Check if service is ready
		observedService, ok := observedComposed["service"]
		if ok && observedService.Resource != nil {
			var obsService corev1.Service
			if err := convertViaJSON(&obsService, observedService.Resource); err == nil {
				if obsService.Spec != nil && obsService.Spec.ClusterIP != nil && *obsService.Spec.ClusterIP != "" {
					if service.Metadata.Annotations == nil {
						service.Metadata.Annotations = &map[string]string{}
					}
					(*service.Metadata.Annotations)["go.upbound.io/ready"] = "True"
				}
			}
		}
		desiredComposed["service"] = service
	}

	// Create Ingress if enabled
	if params.Ingress != nil && params.Ingress.Enabled != nil && *params.Ingress.Enabled {
		ingress := &networkingv1.Ingress{
			APIVersion: ptr.To(networkingv1.IngressAPIVersionNetworkingK8SIoV1),
			Kind:       ptr.To(networkingv1.IngressKindIngress),
			Metadata: &coremetav1.ObjectMeta{
				Name:      xr.Metadata.Name,
				Namespace: xr.Metadata.Namespace,
				Annotations: &map[string]string{
					"kubernetes.io/ingress.class":                       "alb",
					"alb.ingress.kubernetes.io/scheme":                  "internet-facing",
					"alb.ingress.kubernetes.io/target-type":             "ip",
					"alb.ingress.kubernetes.io/healthcheck-path":        "/health",
					"alb.ingress.kubernetes.io/listen-ports":            `[{"HTTP": 80}]`,
					"alb.ingress.kubernetes.io/target-group-attributes": "stickiness.enabled=true,stickiness.lb_cookie.duration_seconds=60",
				},
			},
			Spec: &networkingv1.IngressSpec{
				Rules: &[]networkingv1.IngressRule{{
					HTTP: &networkingv1.HTTPIngressRuleValue{
						Paths: &[]networkingv1.HTTPIngressPath{{
							Path:     ptr.To("/"),
							PathType: ptr.To("Prefix"),
							Backend: &networkingv1.IngressBackend{
								Service: &networkingv1.IngressServiceBackend{
									Name: xr.Metadata.Name,
									Port: &networkingv1.ServiceBackendPort{
										Number: ptr.To(int32(80)),
									},
								},
							},
						}},
					},
				}},
			},
		}

		// Check if ingress is ready
		observedIngress, ok := observedComposed["ingress"]
		if ok && observedIngress.Resource != nil {
			var obsIngress networkingv1.Ingress
			if err := convertViaJSON(&obsIngress, observedIngress.Resource); err == nil {
				if obsIngress.Status != nil && obsIngress.Status.LoadBalancer != nil &&
					obsIngress.Status.LoadBalancer.Ingress != nil && len(*obsIngress.Status.LoadBalancer.Ingress) > 0 {
					firstIngress := (*obsIngress.Status.LoadBalancer.Ingress)[0]
					if firstIngress.Hostname != nil && *firstIngress.Hostname != "" {
						if ingress.Metadata.Annotations == nil {
							ingress.Metadata.Annotations = &map[string]string{}
						}
						(*ingress.Metadata.Annotations)["go.upbound.io/ready"] = "True"
					}
				}
			}
		}
		desiredComposed["ingress"] = ingress
	}

	// Update XR status
	desiredXR, err := request.GetDesiredCompositeResource(req)
	if err != nil {
		response.Fatal(rsp, errors.Wrap(err, "cannot get desired composite resource"))
		return rsp, nil
	}

	// Convert desired XR to WebApp
	var desiredWebApp v1alpha1.WebApp
	desiredWebApp.APIVersion = ptr.To(v1alpha1.WebAppAPIVersionplatformExampleComV1Alpha1)
	desiredWebApp.Kind = ptr.To(v1alpha1.WebAppKindWebApp)
	if err := convertViaJSON(&desiredWebApp, desiredXR.Resource); err != nil {
		response.Fatal(rsp, errors.Wrap(err, "cannot convert desired xr"))
		return rsp, nil
	}

	// Update status fields
	if desiredWebApp.Status == nil {
		desiredWebApp.Status = &v1alpha1.WebAppStatus{}
	}

	// Set deployment conditions
	if observedDeployment, ok := observedComposed["deployment"]; ok && observedDeployment.Resource != nil {
		var obsDeployment appsv1.Deployment
		if err := convertViaJSON(&obsDeployment, observedDeployment.Resource); err == nil {
			if obsDeployment.Status != nil {
				if obsDeployment.Status.Conditions != nil {
					deploymentConditions := []v1alpha1.WebAppStatusDeploymentConditionsItem{}
					for _, c := range *obsDeployment.Status.Conditions {
						condition := v1alpha1.WebAppStatusDeploymentConditionsItem{
							Type:    c.Type,
							Status:  c.Status,
							Message: c.Message,
							Reason:  c.Reason,
						}
						if c.LastUpdateTime != nil {
							condition.LastUpdateTime = ptr.To(c.LastUpdateTime.String())
						}
						if c.LastTransitionTime != nil {
							condition.LastTransitionTime = ptr.To(c.LastTransitionTime.String())
						}
						deploymentConditions = append(deploymentConditions, condition)
					}
					desiredWebApp.Status.DeploymentConditions = &deploymentConditions
				} else {
					// Set empty conditions if no conditions exist
					deploymentConditions := []v1alpha1.WebAppStatusDeploymentConditionsItem{}
					desiredWebApp.Status.DeploymentConditions = &deploymentConditions
				}
				if obsDeployment.Status.AvailableReplicas != nil {
					desiredWebApp.Status.AvailableReplicas = ptr.To(int(*obsDeployment.Status.AvailableReplicas))
				} else {
					// Set default value when no available replicas
					desiredWebApp.Status.AvailableReplicas = ptr.To(0)
				}
			} else {
				// Set defaults when status is nil
				deploymentConditions := []v1alpha1.WebAppStatusDeploymentConditionsItem{}
				desiredWebApp.Status.DeploymentConditions = &deploymentConditions
				desiredWebApp.Status.AvailableReplicas = ptr.To(0)
			}
		}
	} else {
		// Set defaults when deployment doesn't exist
		deploymentConditions := []v1alpha1.WebAppStatusDeploymentConditionsItem{}
		desiredWebApp.Status.DeploymentConditions = &deploymentConditions
		desiredWebApp.Status.AvailableReplicas = ptr.To(0)
	}

	// Set ingress URL
	if observedIngress, ok := observedComposed["ingress"]; ok && observedIngress.Resource != nil {
		var obsIngress networkingv1.Ingress
		if err := convertViaJSON(&obsIngress, observedIngress.Resource); err == nil {
			if obsIngress.Status != nil && obsIngress.Status.LoadBalancer != nil &&
				obsIngress.Status.LoadBalancer.Ingress != nil && len(*obsIngress.Status.LoadBalancer.Ingress) > 0 {
				firstIngress := (*obsIngress.Status.LoadBalancer.Ingress)[0]
				if firstIngress.Hostname != nil {
					desiredWebApp.Status.URL = firstIngress.Hostname
				} else {
					// Set empty string when hostname is nil
					desiredWebApp.Status.URL = ptr.To("")
				}
			} else {
				// Set empty string when no load balancer ingress
				desiredWebApp.Status.URL = ptr.To("")
			}
		} else {
			// Set empty string when conversion fails
			desiredWebApp.Status.URL = ptr.To("")
		}
	} else {
		// Set empty string when ingress doesn't exist
		desiredWebApp.Status.URL = ptr.To("")
	}

	// Convert back to unstructured
	if err := convertViaJSON(desiredXR.Resource, &desiredWebApp); err != nil {
		response.Fatal(rsp, errors.Wrap(err, "cannot convert desired webapp back to unstructured"))
		return rsp, nil
	}

	if err := response.SetDesiredCompositeResource(rsp, desiredXR); err != nil {
		response.Fatal(rsp, errors.Wrap(err, "cannot set desired composite resource"))
		return rsp, nil
	}

	return rsp, nil
}

func convertViaJSON(to, from any) error {
	bs, err := json.Marshal(from)
	if err != nil {
		return err
	}
	return json.Unmarshal(bs, to)
}
import models.io.k8s.api.apps.v1 as appsv1
import models.io.k8s.api.core.v1 as corev1
import models.io.k8s.api.networking.v1 as networkingv1
import models.com.example.platform.v1alpha1 as platformv1alpha1

oxr = platformv1alpha1.WebApp{**option("params").oxr} # observed claim
_ocds = option("params").ocds # observed composed resources
_dxr = option("params").dxr # desired composite resource
dcds = option("params").dcds # desired composed resources

_metadata = lambda name: str -> any {
    { annotations = { "krm.kcl.dev/composition-resource-name" = name }}
}

_desired_deployment = appsv1.Deployment{
    metadata: _metadata("deployment") | {
        name: oxr.metadata.name
        namespace: oxr.metadata.namespace
        labels: {
            "app.kubernetes.io/name": oxr.metadata.name
        }
    }
    spec: {
        replicas: oxr.spec.parameters.replicas
        selector: {
            matchLabels: {
                "app.kubernetes.io/name": oxr.metadata.name
                app: oxr.metadata.name
            }
        }
        template: {
            metadata: {
                labels: {
                    "app.kubernetes.io/name": oxr.metadata.name
                    app: oxr.metadata.name
                }
            }
            spec: {
                serviceAccountName: oxr.spec.parameters.serviceAccount
                containers: [{
                    name: oxr.metadata.name
                    image: oxr.spec.parameters.image
                    imagePullPolicy: "Always"
                    ports: [{
                        name: "http"
                        containerPort: int(oxr.spec.parameters.port)
                        protocol: "TCP"
                    }]
                    resources: {
                        requests: {
                            memory: "64Mi"
                            cpu: "250m"
                        }
                        limits: {
                            memory: "1Gi"
                            cpu: "1"
                        }
                    }
                }]
                restartPolicy: "Always"
            }
        }
    }
}

observed_deployment = option("params").ocds["deployment"]?.Resource
if any_true([c.type == "Available" and c.status == "True" for c in observed_deployment?.status?.conditions or []]):
  _desired_deployment.metadata.annotations["krm.kcl.dev/ready"] = "True"

if oxr.spec.parameters.service.enabled:
    _desired_service = corev1.Service{
        metadata: _metadata("service") | {
            name: oxr.metadata.name
            namespace: oxr.metadata.namespace
        }
        spec: {
            selector: {
                app: oxr.metadata.name
            }
            ports: [{
                name: "http"
                protocol: "TCP"
                port: 80
                targetPort: "http"
            }]
        }
    }

observed_service = option("params").ocds["service"]?.Resource
if observed_service?.spec?.clusterIP:
  _desired_service.metadata.annotations["krm.kcl.dev/ready"] = "True"

if oxr.spec.parameters.ingress.enabled:
    _desired_ingress = networkingv1.Ingress{
        metadata: _metadata("ingress") | {
            name: oxr.metadata.name
            namespace: oxr.metadata.namespace
            annotations: {
                "kubernetes.io/ingress.class": "alb"
                "alb.ingress.kubernetes.io/scheme": "internet-facing"
                "alb.ingress.kubernetes.io/target-type": "ip"
                "alb.ingress.kubernetes.io/healthcheck-path": "/health"
                "alb.ingress.kubernetes.io/listen-ports": '[{"HTTP": 80}]'
                "alb.ingress.kubernetes.io/target-group-attributes": "stickiness.enabled=true,stickiness.lb_cookie.duration_seconds=60"
            }
        }
        spec: {
            rules: [{
                http: {
                    paths: [{
                        path: "/"
                        pathType: "Prefix"
                        backend: {
                            service: {
                                name: oxr.metadata.name
                                port: {
                                    number: 80
                                }
                            }
                        }
                    }]
                }
            }]
        }
    }


observed_ingress = option("params").ocds["ingress"]?.Resource
if observed_ingress?.status?.loadBalancer?.ingress?[0]?.hostname:
  _desired_ingress.metadata.annotations["krm.kcl.dev/ready"] = "True"

_desired_xr = {
  **option("params").dxr
  status.deploymentConditions = observed_deployment?.status?.conditions or []
  status.availableReplicas = observed_deployment?.status?.availableReplicas or 0
  status.url = observed_ingress?.status?.loadBalancer?.ingress?[0]?.hostname or ""
}


items = [
    _desired_deployment,
    _desired_service,
    _desired_ingress,
    _desired_xr
]
Deploy the changes you made to your control plane:
up project run --local --ingress
The project run command builds and deploys any changes. If you don't have a
control plane running yet, it creates one, otherwise it targets your existing
control plane.
Use the custom resource
Your control plane now understands WebApp resources. Create a WebApp:
kubectl apply -f examples/webapp/webapp.yaml
Check that the WebApp is ready:
Resource and deployment names are auto-generated and will differ from the example outputs below.
kubectl get -f examples/webapp/webapp.yaml
NAME     SYNCED   READY   COMPOSITION   AGE
webapp   True     True    app-yaml      56s
Observe the Deployment and Service Crossplane created when you created the WebApp:
kubectl get deploy,service -l crossplane.io/composite=webapp
NAME                           READY   UP-TO-DATE   AVAILABLE   AGE
deployment.apps/webapp-2r2rk   2/2     2            2           11m

NAME                   TYPE        CLUSTER-IP     EXTERNAL-IP   PORT(S)    AGE
service/webapp-xfkzg   ClusterIP   10.96.148.56   <none>        8080/TCP   11m
Next steps
Now that you know the basics of building with Upbound, create an AI-augmented operation to detect and remediate Kubernetes app workload errors. Read Create an AI-augmented operation.