Migrate to Official Providers
This guide requires Crossplane v1.14.6 or higher.
Upbound provides migration tooling to move from monolithic providers to Upbound's Official family providers.
You can also use this migration tool to upgrade from one version of an Official Provider to another that requires breaking API changes.
Migrate from community to Official Providers
For community provider to Official provider migration, you must manually migrate your providers.
To migrate existing managed resources to official providers, you can update your provider's scheme and apply the updated manifest to import your existing resources. You can either scale down the old provider or pause annotations to prevent conflicts during the reconciliation loop.
First, backup your resources, manifests, and claims:
kubectl get managed -o yaml > backup-mrs.yaml
kubectl get composite -o yaml > backup-composites.yaml
kubectl get claim --all-namespaces -o yaml > backup-claims.yaml
Next, set your resources to Orphan mode:
# Check what's already orphaned
kubectl get $(kubectl get managed -o name) -o json | jq '.items[] | select(.spec.deletionPolicy=="Orphan")'

# Set all to orphan (prevents deletion)
kubectl patch $(kubectl get managed -o name) -p '{"spec":{"deletionPolicy":"Orphan"}}' --type=merge
Generate a list of the family providers:
wget https://raw.githubusercontent.com/upbound/extensions-migration/main/docs/generate-manifests.sh
chmod +x generate-manifests.sh
./generate-manifests.sh
Use the files you generated in the previous command to install the new providers:
# Install configuration provider
kubectl apply -f sp-family-manual.yaml

# Install resource providers
kubectl apply -f sp-manual.yaml

# Verify installation
kubectl get providers
Next, turn off dependency resolution and remove the previous provider references:
# Skip dependency resolution
kubectl patch configuration.pkg -p '{"spec":{"skipDependencyResolution": true}}' --type=merge

# Edit lock and remove old provider references
kubectl edit lock lock
Delete the old provider:
kubectl delete provider.pkg <old-provider-name>
Set the revisionActivationPolicy to Authomatic:
# Make providers automatic
sed 's/revisionActivationPolicy: Manual/revisionActivationPolicy: Automatic/' sp-family-manual.yaml > sp-family-automatic.yaml
sed 's/revisionActivationPolicy: Manual/revisionActivationPolicy: Automatic/' sp-manual.yaml > sp-automatic.yaml

kubectl apply -f sp-family-automatic.yaml
kubectl apply -f sp-automatic.yaml
Set your deletionPolicy to Delete:
kubectl patch $(kubectl get managed -o name) -p '{"spec":{"deletionPolicy":"Delete"}}' --type=merge
Provider changes
Observe the changes in your API version after the migration:
- apiVersion: ec2.aws.crossplane.io/v1beta1
+ apiVersion: ec2.aws.upbound.io/v1beta1
Fields in your provider may also change:
- enableDnsHostNames: true
+ enableDnsHostnames: true

- tags:
-   - key: Name
-     value: my-vpc
+ tags:
+   Name: my-vpc
Migrating VPC managed resource
The diff below shows the required changes to migrate a community provider-aws VPC resource to an Official provider-aws VPC. Note the changes to the API version and some field names/types in spec and status sub-resources. To find out which fields to update, compare the CRDs in the current provider version and the target Official provider version.
-   apiVersion: ec2.aws.crossplane.io/v1beta1
+   apiVersion: ec2.aws.upbound.io/v1beta1
    kind: VPC
    metadata:
      annotations:
        crossplane.io/external-create-pending: "2022-09-23T12:20:31Z"
        crossplane.io/external-create-succeeded: "2022-09-23T12:20:33Z"
        crossplane.io/external-name: vpc-008f150c8f525bf24
        kubectl.kubernetes.io/last-applied-configuration: |
          {"apiVersion":"ec2.aws.crossplane.io/v1beta1","kind":"VPC","metadata":{"annotations":{},"name":"ezgi-vpc"},"spec":{"deletionPolicy":"Delete","forProvider":{"cidrBlock":"192.168.0.0/16","enableDnsHostNames":true,"enableDnsSupport":true,"instanceTenancy":"default","region":"us-west-2","tags":[{"key":"Name","value":"platformref-vpc"},{"key":"Owner","value":"Platform Team"},{"key":"crossplane-kind","value":"vpc.ec2.aws.crossplane.io"},{"key":"crossplane-name","value":"ezgi-plat-ref-aws-tcg6t-n6zph"},{"key":"crossplane-providerconfig","value":"default"}]},"providerConfigRef":{"name":"default"}}}
      creationTimestamp: "2022-09-23T12:18:21Z"
      finalizers:
      - finalizer.managedresource.crossplane.io
      generation: 2
      name: ezgi-vpc
      resourceVersion: "22685"
      uid: 81211d98-57f2-4f2e-a6db-04bb75cc60ff
    spec:
      deletionPolicy: Delete
      forProvider:
        cidrBlock: 192.168.0.0/16
-       enableDnsHostNames: true
+       enableDnsHostnames: true
        enableDnsSupport: true
        instanceTenancy: default
        region: us-west-2
        tags:
-       - key: Name
-         value: platformref-vpc
-       - key: Owner
-         value: Platform Team
-       - key: crossplane-kind
-         value: vpc.ec2.aws.crossplane.io
-       - key: crossplane-name
-         value: ezgi-vpc
-       - key: crossplane-providerconfig
-         value: default
+         Name: platformref-vpc
+         Owner: Platform Team
+         crossplane-kind: vpc.ec2.aws.upbound.io
+         crossplane-name: ezgi-vpc
+         crossplane-providerconfig: default
      providerConfigRef:
        name: default
Migrating Crossplane configurations
Along with the managed resource migration, you update the composition and claim files to match the new CRDs. First start to import the existing resources to the Official provider and then update the configuration package version to point to the Official provider.
-
Backup managed resource manifests
kubectl get managed -o yaml > backup-mrs.yaml -
Scale down Crossplane deployment
kubectl scale deploy crossplane --replicas=0 -
Update deletion policy to
Orphanwith the command below:kubectl patch $(kubectl get managed -o name) -p '{"spec": {"deletionPolicy":"Orphan"}}' --type=merge -
Update composition files to the new API version
upbound.io, external-name annotations and new field names/types. You can use the Upbound Marketplace for comparing CRD schema changes. -
Update
crossplane.yamlfile with official provider dependency. -
Build and push the new configuration version
-
Install the Official provider
-
Install the ProviderConfig
-
Update managed resource manifests with the same changes done on composition files
cp backup-mrs.yaml op-mrs.yaml
vi op-mrs.yaml -
Scale down native provider deployment
kubectl scale deploy ${deployment_name} --replicas=0 -
Apply updated managed resources and wait until they become ready
kubectl apply -f op-mrs.yaml -
Delete old MRs
kubectl delete -f backup-mrs.yaml
kubectl patch -f backup-mrs.yaml -p '{"metadata":{"finalizers":[]}}' --type=merge -
Update the configuration to the new version
cat <<EOF | kubectl apply -f -
apiVersion: pkg.crossplane.io/v1
kind: Configuration
metadata:
  name: ${configuration_name}
spec:
  package: ${configuration_registry}/${configuration_repository}:${new_version}
EOF -
Scale up Crossplane deployment
kubectl scale deploy crossplane --replicas=1 -
Delete old ProviderConfig
kubectl delete providerconfigs ${provider_config_name} -
Delete old provider
kubectl delete providers ${provider_name}
Migrating VPC in a composition
In the below, there is a small code snippet from platform-ref-aws to update VPC resource.
   resources:
     - base:
-        apiVersion: ec2.aws.crossplane.io/v1beta1
+        apiVersion: ec2.aws.upbound.io/v1beta1
         kind: VPC
         spec:
           forProvider:
             spec:
               region: us-west-2
               cidrBlock: 192.168.0.0/16
               enableDnsSupport: true
-              enableDnsHostNames: true
+              enableDnsHostnames: true
-              tags:
-              - key: Owner
-                value: Platform Team
-              - key: Name
-                value: platformref-vpc
+              tags:
+                Owner: Platform Team
+                Name: platformref-vpc
       name: platformref-vcp
The following PRs are examples which show a migration of the existing platform-refs:
- platform-ref-aws: https://github.com/upbound/platform-ref-aws/pull/69
- platform-ref-azure: https://github.com/upbound/platform-ref-azure/pull/10
- platform-ref-gcp: https://github.com/upbound/platform-ref-gcp/pull/22
Migrating from monolithic to family Official Providers
Two ways exist to migrate from Monolithic providers to Family providers.
Users who choosing the Automated method should review the Pre-requisites section of the relevant part.
Manual migration
The Upbound official provider families organize provider resources into common, logical, groupings. Provider families replace the original monolithic providers, which combined all provider resources into a single Provider package.
Migrating from a monolithic provider to a family provider allows the family provider to take ownership of existing managed resources.
Upbound only supports migration from Upbound's official monolithic providers at present.
Backup existing Crossplane resources
Backup the existing Crossplane resources including managed resources, Compositions and Claims.
In case of problems, Crossplane can restore the resources from the YAML files.
This may take over 10 minutes depending on the number of managed resources in the cluster.
kubectl get managed -o yaml > backup-mrs.yaml
kubectl get composite -o yaml > backup-composites.yaml
kubectl get claim --all-namespaces -o yaml > backup-claims.yaml
Update the resource deletion policy
Update the deletion policy on all managed resources to Orphan to prevent
Crossplane from deleting the resources.
Find any resources that are already set to Orphan.
kubectl get $(kubectl get managed -o name) -o json | jq '.items[] | select(.spec.deletionPolicy=="Orphan") | "\(.spec.forProvider.tags."crossplane-kind")/\(.spec.forProvider.tags."crossplane-name")"'
Save the names of any returned resources.
Next, set the deletion policy of all managed resources to Orphan.
kubectl patch $(kubectl get managed -o name) -p '{"spec":{"deletionPolicy":"Orphan"}}' --type=merge
These commands may take over 10 minutes depending on the number of managed resources in the cluster.
If you are using the Management Policies beta feature, they may take precedence over the
deletionPolicy field. See
the Crossplane documentation
for details.
Create a list of family provider services
Upbound maintains a migration script that maps all existing managed resources to their family provider packages. This script generates a list of new family providers to install.
- Download the script
wget https://raw.githubusercontent.com/upbound/extensions-migration/main/docs/generate-manifests.sh
chmod +x generate-manifests.sh
- Run the script to generate a list of provider family packages. The script
produces two files,
sp-family-manual.yamlfor the new family configuration provider andsp-manual.yamlfor the required individual family providers.
The script relies on kubectl to connect to your Kubernetes cluster.
./generate-manifests.sh
Generating manifests from current cluster
The files set the revisionActivationPolicy on each provider to Manual to prevent the providers from competing over the resources.
Install the new family configuration provider
Apply the sp-family-manual.yaml generated by the script to your cluster.
kubectl apply -f sp-family-manual.yaml
Verify the upbound-provider-family-<name> provider is INSTALLED: False and HEALTHY: True.
kubectl get providers
NAME                          INSTALLED   HEALTHY   PACKAGE                                               AGE
upbound-provider-aws          True        True      xpkg.upbound.io/upbound/provider-aws:v0.27.0          26m
upbound-provider-family-aws   False       True      xpkg.upbound.io/upbound/provider-family-aws:v0.36.0   6m56s
Family providers use a single provider-family-<name> Provider to manage ProviderConfig objects across all resource providers in the same family.
Install the family resource providers
Use the sp-manual.yaml file to install the providers for each resource.
kubectl apply -f sp-manual.yaml
Verify the resource providers are INSTALLED: False and HEALTHY: True.
This example only uses a single resource, s3.
kubectl get providers
NAME                          INSTALLED   HEALTHY   PACKAGE                                                AGE
upbound-provider-aws          True        True      xpkg.upbound.io/upbound/provider-aws:v0.27.0           30m
upbound-provider-aws-s3       False       True      xpkg.upbound.io/upbound/provider-aws-s3:v0.36.0       5s
upbound-provider-family-aws   False       True      xpkg.upbound.io/upbound/provider-family-aws:v0.36.0   10m
Remove original Providers as a Configuration dependency
Check for any installed Configurations.
kubectl get configurations.pkg
NAME                       INSTALLED   HEALTHY   PACKAGE                                           AGE
upbound-platform-ref-aws   True        True      xpkg.upbound.io/upbound/platform-ref-aws:v1.4.0   3h14m
If you don't have an installed Configuration skip to delete the monolithic provider.
Remove any Configuration dependencies on the original Provider to prevent it from being automatically reinstalled.
kubectl patch configuration.pkg <CONFIGURATION_NAME> -p '{"spec":{"skipDependencyResolution": true}}' --type=merge
Remove the Crossplane lock
Edit the Crossplane Lock object and remove the old Provider.
kubectl edit lock lock
Remove the packages array item where type: Configuration and dependencies[0].package is the monolith provider.
An example Lock before editing
apiVersion: pkg.crossplane.io/v1beta1
kind: Lock
metadata:
  creationTimestamp: "2023-05-16T14:37:01Z"
  finalizers:
    - lock.pkg.crossplane.io
  generation: 99
  name: lock
  resourceVersion: "1969272"
  uid: aa60ed13-ec55-4047-b409-b96beb9fe286
packages:
  - dependencies:
      - constraints: '>=v0.31.0'
        package: xpkg.upbound.io/upbound/provider-gcp
        type: Provider
    name: ezgid-test-smaller-provider-migration-3a0d5472dd78
    source: index.docker.io/ezgid/test-smaller-provider-migration
    type: Configuration
    version: v0.4.0
  - dependencies: []
    name: upbound-provider-gcp-a206c0fc297b
    source: xpkg.upbound.io/upbound/provider-gcp
    type: Provider
    version: v0.32.0
An example Lock after editing
apiVersion: pkg.crossplane.io/v1beta1
kind: Lock
metadata:
  creationTimestamp: "2023-05-16T14:37:01Z"
  finalizers:
    - lock.pkg.crossplane.io
  generation: 99
  name: lock
  resourceVersion: "1969272"
  uid: aa60ed13-ec55-4047-b409-b96beb9fe286
packages:
  - dependencies: []
    name: upbound-provider-gcp-a206c0fc297b
    source: xpkg.upbound.io/upbound/provider-gcp
    type: Provider
    version: v0.32.0
Delete the original monolithic provider
Now delete the original monolithic Provider.
kubectl delete provider.pkg <PROVIDER_NAME>
Edit the family configuration provider revision activation policy
Change the family configuration provider's revisionActivationPolicy from Manual to Automatic.
sed 's/revisionActivationPolicy: Manual/revisionActivationPolicy: Automatic/' sp-family-manual.yaml > sp-family-automatic.yaml
Apply the updated family configuration provider manifest.
kubectl apply -f sp-family-automatic.yaml
Edit the family resource providers revision activation policies
Change the family resource providers' revisionActivationPolicy from Manual to Automatic.
sed 's/revisionActivationPolicy: Manual/revisionActivationPolicy: Automatic/' sp-manual.yaml > sp-automatic.yaml
Apply the updated family resource provider manifests.
kubectl apply -f sp-automatic.yaml
Verify the provider and resources
View the status of the updated family providers.
kubectl get managed
NAME                                                   READY   SYNCED   EXTERNAL-NAME                 AGE
bucket.s3.aws.upbound.io/crossplane-bucket-7000278b2   True    True     crossplane-bucket-7000278b2   59s
kubectl get provider.pkg
NAME                          INSTALLED   HEALTHY   PACKAGE                                               AGE
upbound-provider-aws          True        True      xpkg.upbound.io/upbound/provider-aws-s3:v0.36.0       4m59s
upbound-provider-family-aws   True        True      xpkg.upbound.io/upbound/provider-family-aws:v0.36.0   3m44s
Restore the resource deletion policy
Restore the resource deletion policy to Delete.
This updates the deletion policy of all resources. If you expect any
resources to
use the Orphan policy, update those individually or manually change
the policy to Delete on the other resources.
kubectl patch $(kubectl get managed -o name) -p '{"spec":{"deletionPolicy":"Delete"}}' --type=merge
The cluster is now fully migrated to a family provider.
Automated migration
family-migrator is a tool to automate the migration process from the
monolithic to provider family architecture. The tool supports an interactive and
non-interactive migration path.
Pre-requisites
kubectl: Before starting the execution phase, please ensure you have thekubectltool installed.family-migratoruses thekubectltool in the execution phase, and it assumes availability of this tool locally during the non-interactive run.
- The user must be on a device with access to the Kubernetes cluster. If the
default config file (
~/.kube/config) doesn't refer to the cluster to migrate, the user must set the--kubeconfigflag with the path to the config file that references the correct cluster.
- The
family-migratortool currently supports a limited scenario. The scenario assumes the following:- The cluster contains an installed configuration package. In other
words, the cluster has a
Configuration.pkg.crossplane.io/v1resource and one or more monolithic provider. - The configuration package and its examples are available on the user's local
file system
- Configuration package: This directory contains the Configuration.meta.pkg.crossplane.io manifest (that contains the provider dependencies), Compositions, and CompositeResourceDefinitions. An example, configuration package: https://github.com/upbound/platform-ref-gcp/tree/main/apis.
- Examples: This directory may contain Claims, and Configuration.pkg.crossplane.io resource. An example of configuration examples: https://github.com/upbound/platform-ref-gcp/tree/main/examples.
- To user has the required authorization to push the new configuration package image to the registry
- The cluster contains an installed configuration package. In other
words, the cluster has a
Installation
- Please use the Releases page to download the
family-migratortool. Download the appropriate binary for your operating system (LinuxorDarwin/macOS) and architecture (amd64orarm64). The download is an executable file which might require the necessary file permissions to allow execution. - Move the downloaded binary to
/usr/local/bin - Give permission to execute the binary
chmod +x family-migrator_darwin-arm64
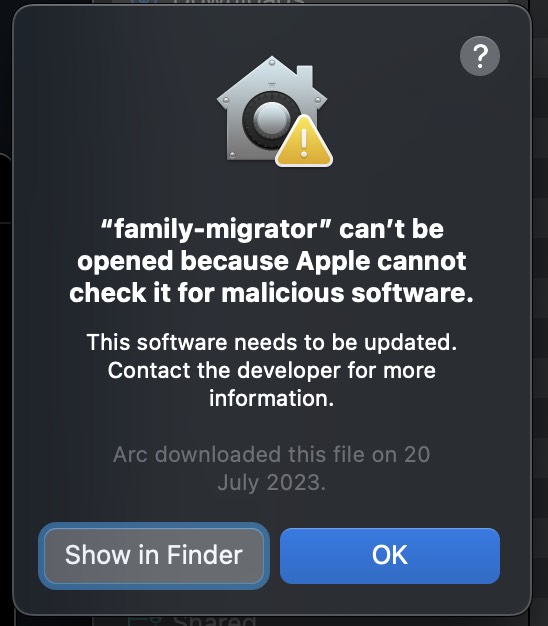
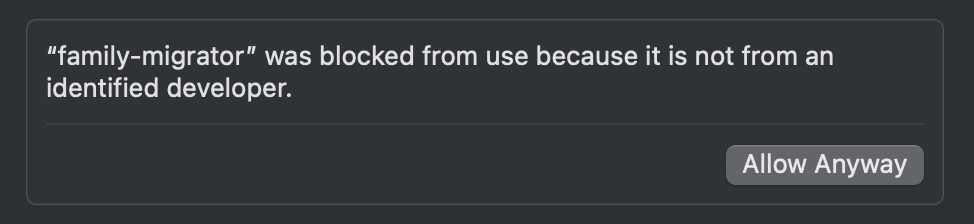
In Darwin/macOS, you might get the following error.
Please allow this application in the Security Settings by using the
Allow Anyway.
Usage
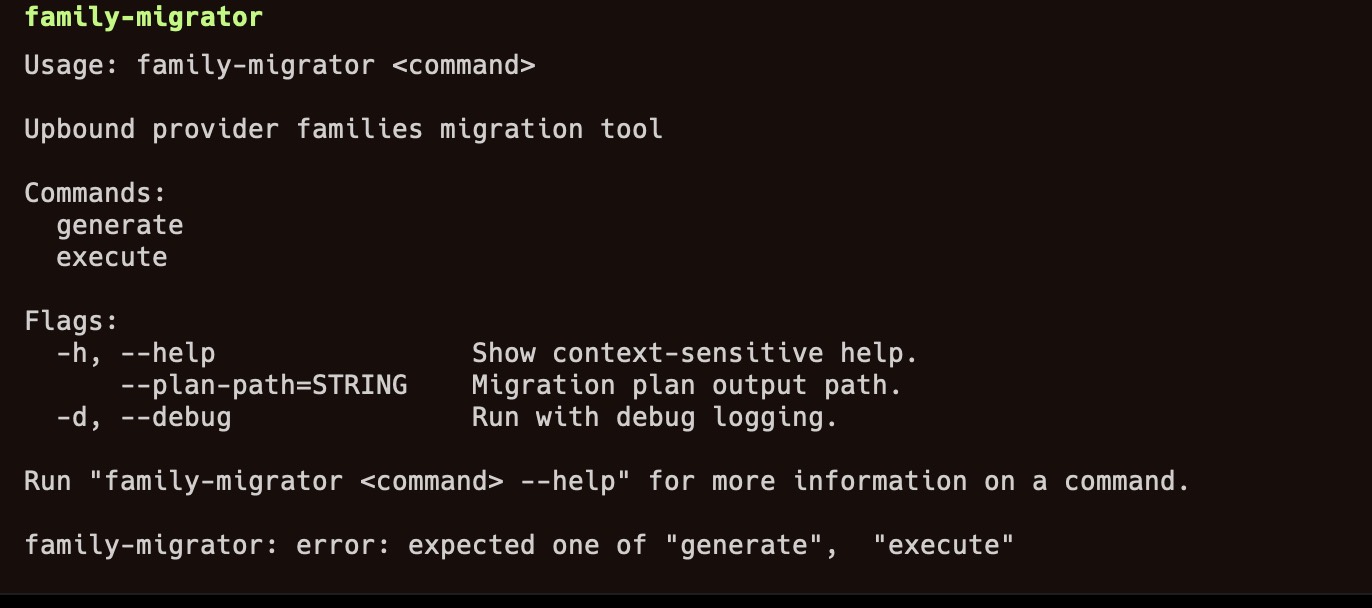
The family-migrator tool has two sub-commands, generate and execute.
The help output of the family-migrator:
-
generate: This command generates the migration plan. After the tool creates the migration plan, it confirms if execution of the created plan should proceed. -
execute: Used for executing a generated migration plan. You must generate a migration plan first before running this command.
The family-migrator tool needs several inputs for generating and executing the
plan. It prompts for all required options when executing the command.
Required inputs
When running the family-migrator generate command, the tool prompts the
user with a series of questions to gather the required inputs:
| Required input | Description |
|---|---|
| Please specify the path for the migration plan | The answer represents the output path of the migration plan. Users need to provide a path for generating the plan and patch files. For example, /tmp/generated/migration-plan.yaml |
| Please provide the registry and organization for the provider family packages | The format must be <registry host>/<organization>, for example, xpkg.upbound.io/upbound. |
| Please select the providers that will be migrated | The tool presents user with a list of the monolithic providers they can select to migrate from. The tool supports multiple selections. |
| Please specify the version of the provider-abc family | Provide the versions of the family provider to migrate to for each selected provider. If you want to migrate to the latest version, refer to the Upbound Marketplace. The version format must be v0.y.y |
| Please enter the URL of the migration source Configuration package | Provide the registry URL of the currently installed Configuration Package. The value appears in the spec.package path of Configuration.pkg.crossplane.io/v1 resource. For example, xpkg.upbound.io/upbound/platform-ref-gcp:v0.3.0 |
| Please enter the URL of the migration target Configuration package | The tool builds a new configuration package during migration. Specify the registry URL where the migrated built package is uploaded. For example, registry-host/organization/platform-ref-gcp:v0.3.0-migrated |
| Please specify the source directory for the Crossplane Configuration package | Specify the source directory to the location of the configuration package. This directory contains the Configuration.meta.pkg.crossplane.io manifest that contains the provider dependencies, Compositions, and CompositeResourceDefinitions. For example: /Users/user/workspace/platform-ref-gcp/package Example configuration package: https://github.com/upbound/platform-ref-gcp/tree/main/apis |
| Please specify the path to the directory containing the Crossplane package examples | Specify the directory to the location of the configuration package examples. This directory may contain Claims, and Configuration.pkg.crossplane.io resource. For example: /Users/user/workspace/platform-ref-gcp/examples Example configuration examples: https://github.com/upbound/platform-ref-gcp/tree/main/examples. |
After the tool collects all the inputs it needs, it generates and exports the migration plan to the specified path. It then asks whether to continue to execute the created plan.
Generating the plan may take some time, depending on the number of providers and CRDs in your cluster. Please don't stop the process until it completes. After generation, the tool shows a message that the plan has been generated.
Review generated plan, manifests, and patch files
After moving on to the execution phase, confirm the review of the generated plan and manifests. After confirmation, you have the option to list the execution instructions.
The purpose of this intermediary step is to allow for manual verification to ensure no unexpected steps are introduced in the plan. The review process is optional and doesn't directly affect the transition to the execution phase, it's strongly recommended to complete the review process.
Execution
Having collected the required inputs, generated the migration plan, and reviewed the plan, the execution phase can now proceed.
The tool has two modes for execution:
Do you want to execute the migration plan with step-by-step confirmation or no interaction
- Step-by-Step (Interactive): In this option, the tool executes each step individually, providing context and asking for confirmation.
- No Interaction: In this option, the tool executes all steps without any interaction.
Step-by-Step (interactive) execution
With the interactive execution mode, for each step, there are three options:
? Step (with name "backup-managed-resources" at index 0) to execute:
sh -c "kubectl get managed -o yaml > backup/managed-resources.yaml"
What is your execution preference?
- Automatically: The step gets executed and the output shown.
- Manually: The step needs to be manually executed by the user.
- Skip: No execution takes place. Be careful since you can't return to a skipped step.
Steps to backup the resources may take a long time, depending on the number of resources, installed providers, and CRDs in the cluster.
Non-Interactive execution
In this mode execution of the migration plan proceeds without user interaction.
You can verify the correct completion of the migration by checking the status of the cluster. Use the following commands to confirm the cluster status:
kubectl get providers.pkg.crossplane.io: The family providers should show instead of monolithic ones.kubectl get pods -n upbound-system: The family provider pods should show in theupbound-systemnamespace.kubectl get configurations.pkg.crossplane.io: The newly built configuration package appears in thespec.packagepath. The family provider references appear in thespec.dependsOnpath of Configuration.meta.pkg.crossplane.io (by defaultcrossplane.yaml) manifest. This manifest is in the source package directory on the file system.