Get Started
This solution demonstrates how to configure Upbound control planes to power a streamlined, self-service platform for your engineering teams. Clone and tailor it to your needs to roll out an Internal Developer Platform (IDP). An IDP enables developers to spin up resources that are production-ready, policy-compliant, and governed by Upbound's control mechanisms and proven patterns.
This guide helps you deploy this solution.
Before you begin
This quickstart assumes a basic understanding of Crossplane, Backstage, and ArgoCD concepts. For more information, see their respective documentation pages:
- Crossplane: https://docs.crossplane.io/latest/get-started/get-started-with-composition/
- Backstage: https://backstage.io/docs/features/techdocs/
- ArgoCD: https://argo-cd.readthedocs.io/en/stable/
Prerequisites
Before you start to deploy this solution, you need to have the following:
- An Upbound Account and Organization created
- AWS credentials stored at
/Users/$USER/.aws/aws.json - A Unix-like system (macOS/Linux/WSL)
- Docker Desktop
- kubectl
- Upbound CLI up
This solution involves deploying backend Kubernetes infrastructure for components of the platform. Only AWS EKS is currently implemented, but the same concepts demonstrated in the solution may be applied to Azure and GCP.
Clone this repository
Building out your Internal Developer Platform (IDP) with Upbound couldn't be easier with the starter kit. To get started, first fork the starter kit implementation found at https://github.com/upbound/solution-idp and clone it.
# Update the repository to your fork
git clone https://github.com/upbound/solution-idp.git
cd solution-idp
Install Task CLI
This project leverages Task for automating setup steps. Install it if you don't have it on your machine.
brew install go-task/tap/go-task
Login to Upbound
The first step in deployment is to authenticate your up CLI. Login with the following command:
up login
Select an Upbound Space for deployment
Select the Upbound Space to the control planes responsible for bootstrapping and managing the IDP. You can either choose a Cloud Space or self-hosted Upbound Space.
- Cloud Space
- Self-Hosted Space
This command uses Upbound's AWS US East Cloud Space, but you can choose any other Cloud Space if you like:
up ctx $UPBOUND_ORGANIZATION/upbound-aws-us-east-1/default
Update this command to refer to a self-hosted Space you've already deployed and connected to the Upbound Console:
up ctx $UPBOUND_ORGANIZATION/$SELF_HOSTED_SPACE_NAME/default
Bootstrap your environment
Configure launch variables
Configure the variables defined in /state/solution-idp-non-prod/Taskfile.yaml:
vars:
  AWS_CREDENTIALS_PATH:
  UPBOUND_ORG:
  UPBOUND_ORG_TEAM:
  SPACE:
  ROOT_GROUP_NAME: "solution-idp-non-prod"
  ROOT_CTP_NAME: "bootstrap"
  GIT_REPO:
  GIT_REVISION: "main"
Here's an explanation for each variable above:
AWS_CREDENTIALS_PATH: Path to your AWS credentials used by the bootstrap control plane in a ProviderConfigUPBOUND_ORG: Your Upbound Organization. You can find this by runningup org list.UPBOUND_ORG_TEAM: The Upbound organization team to house the robot accounts Backstage uses for authentication.SPACE: Upbound Space that hosts the bootstrap and frontend control planesROOT_GROUP_NAME: Root Upbound group name to house bootstrap control plane. Default:solution-idp-non-prodROOT_CTP_NAME: Root control plane responsible for bootstrapping this solution. Default:boostrapGIT_REPO: The Git repository URL of the forked starter kitGIT_REVISION: target branch of GIT_REPO. Default: main
Execute the bootstrap
After you populate the variables, bootstrap your environment:
cd state/solution-idp-non-prod
task bootstrap-all
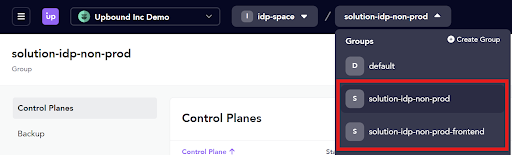
The bootstrap process takes 3 to 5 minutes. After the command finishes, go to your space and observe the two newly created control plane groups:
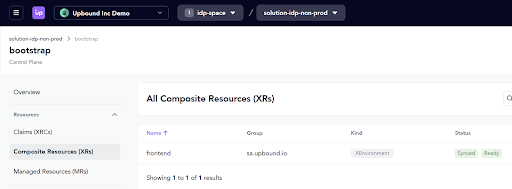
Next go to the bootstrap control plane in solution-idp-non-prod group and validate that the frontend composite resource (XR) shows synced and ready:
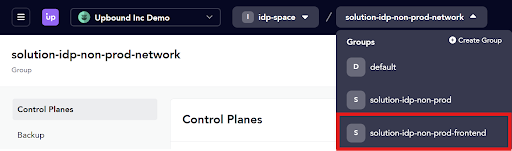
Once the frontend XR is ready, go to the frontend control plane group:
Then validate that all the XRs become synced and ready:

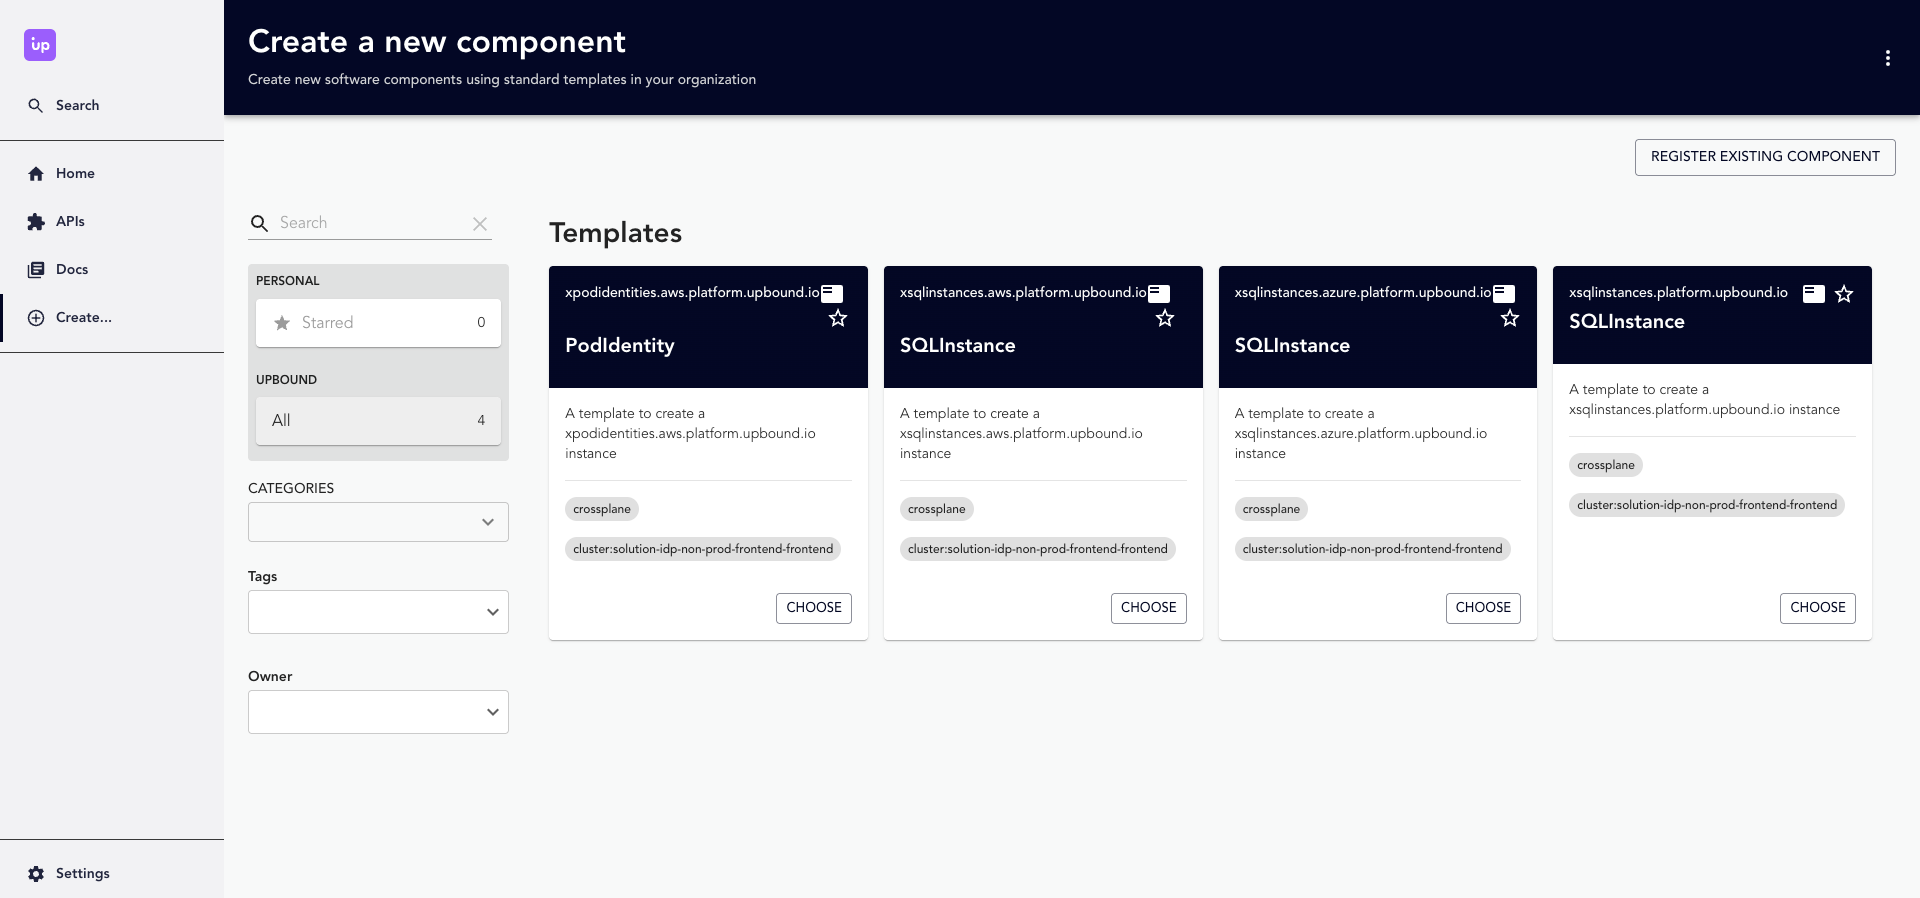
Visit the development portal
Once everything gets fully provisioned, visit the development portal for your platform:
Clean up
To clean up the platform, delete the root Application from the bootstrap control plane, then delete all the XEnvironments from the bootstrap control plane.